How To Add an Organization’s Object (org) To the RIPE Inetnum
Learn how to create and add your organization's org attribute in RIPE NCC.
Before you upload a subnet to the IPXO Marketplace, make sure you have added your organization’s org attribute to the inetnum you created in RIPE. You need to do this to receive the subnet ownership confirmation email.
Follow the instructions below to learn how to add an org to your RIPE inetnum.
Prerequisites
If you want to upload RIPE allocated subnets to the IPXO Marketplace, here are a few things to keep in mind:
- IPXO will validate the inetnums with the status attribute containing a value of either SUB-ALLOCATED PA, LEGACY or ASSIGNED PA.
- If the value of the status attribute is ALLOCATED PA, and the subnet mask of the inetnum is less than 24 (i.e., the subnet is larger, e.g. 192.168.10.0/23), IPXO will require you to create more specific inetnums (e.g., 192.168.10.0/24 and 192.168.11.0/24) with the status SUB-ALLOCATED PA and add them to IPXO.
- You must add your organization’s code in the org attribute when creating inetnum and also add IPXO-MNT as the mnt-by attribute, so that IPXO could control the inetnum needed for automation. Use this guide to learn how to add the mnt-by attribute.
- If the value of the status attribute is ASSIGNED PI, IPXO will not validate the inetnum. Here is an official guide from RIPE on how to convert an Assigned PI to an Allocated PA.
Where to find my organization’s object (org) in RIPE?
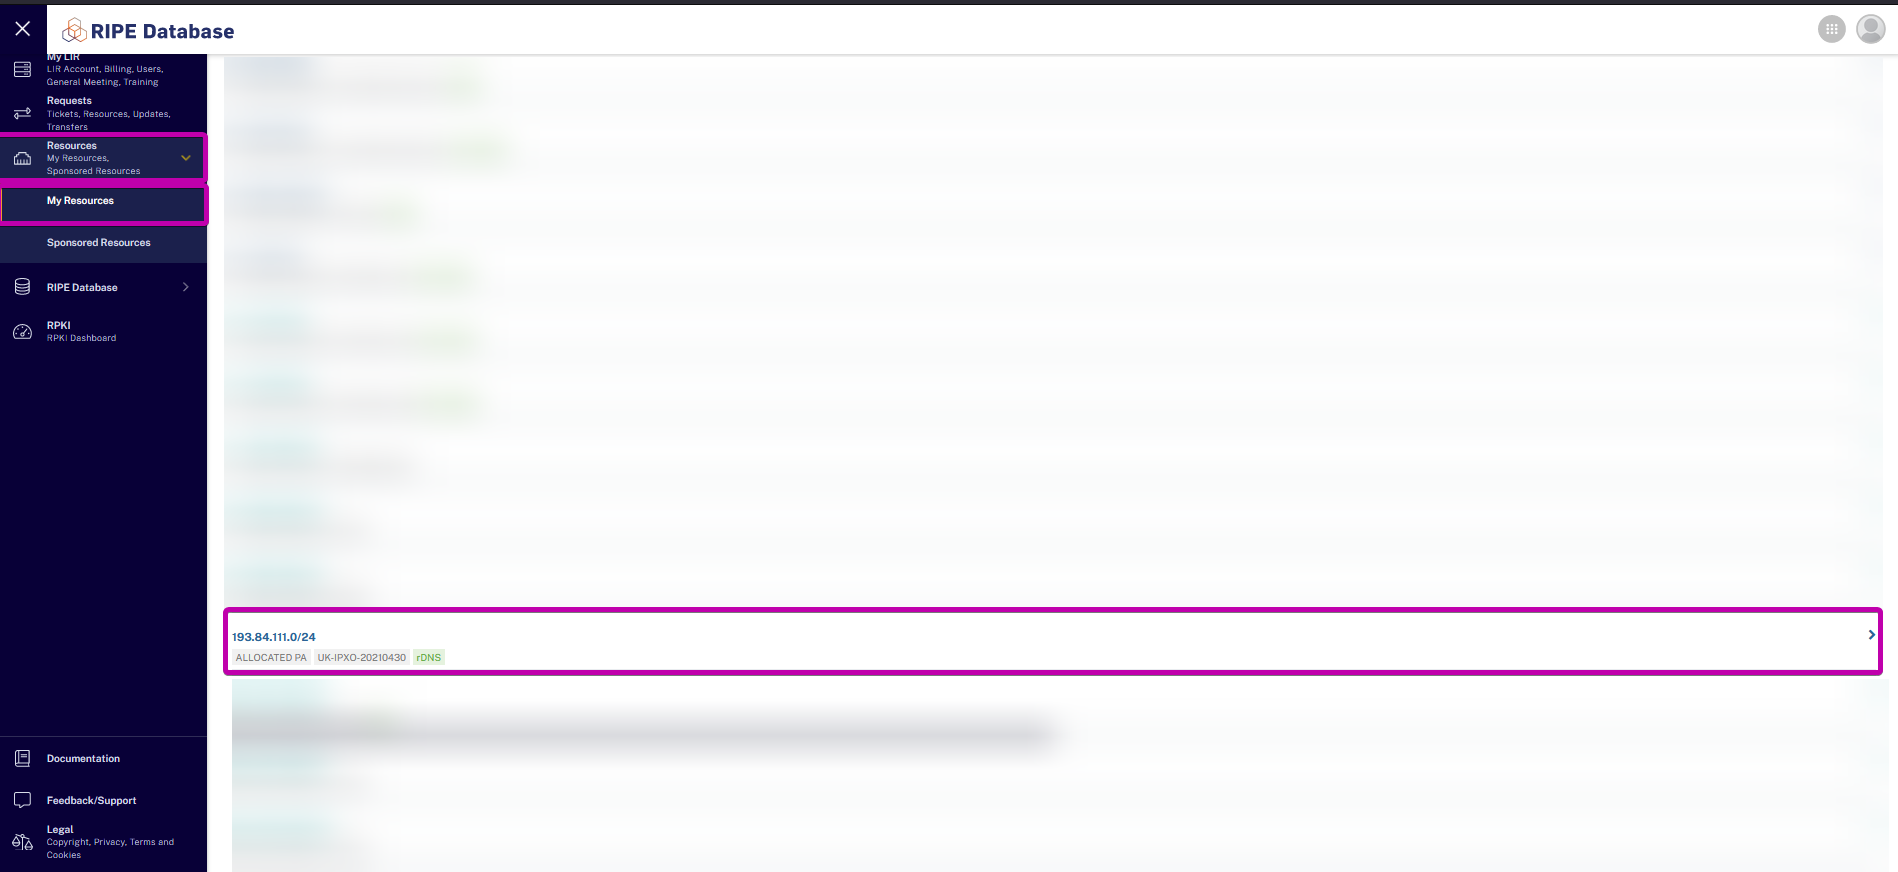
If you do not know what your org attribute is, you can use these easy steps to find it. As an example, we use the subnet 193.84.111.0/24.
Step 1: Find the subnet that was issued by RIPE
Log in to your RIPE NCC Access account and open the RIPE Database. Click Resources in the menu on the left and then click My Resources. Find and select the subnet that was issued to you by RIPE.
Step 2: Find your subnet’s org
When you open the subnet, you will find the Object in RIPE Database information. In the column on the left, you can find the org field. On the right column, you can find your organization’s object.
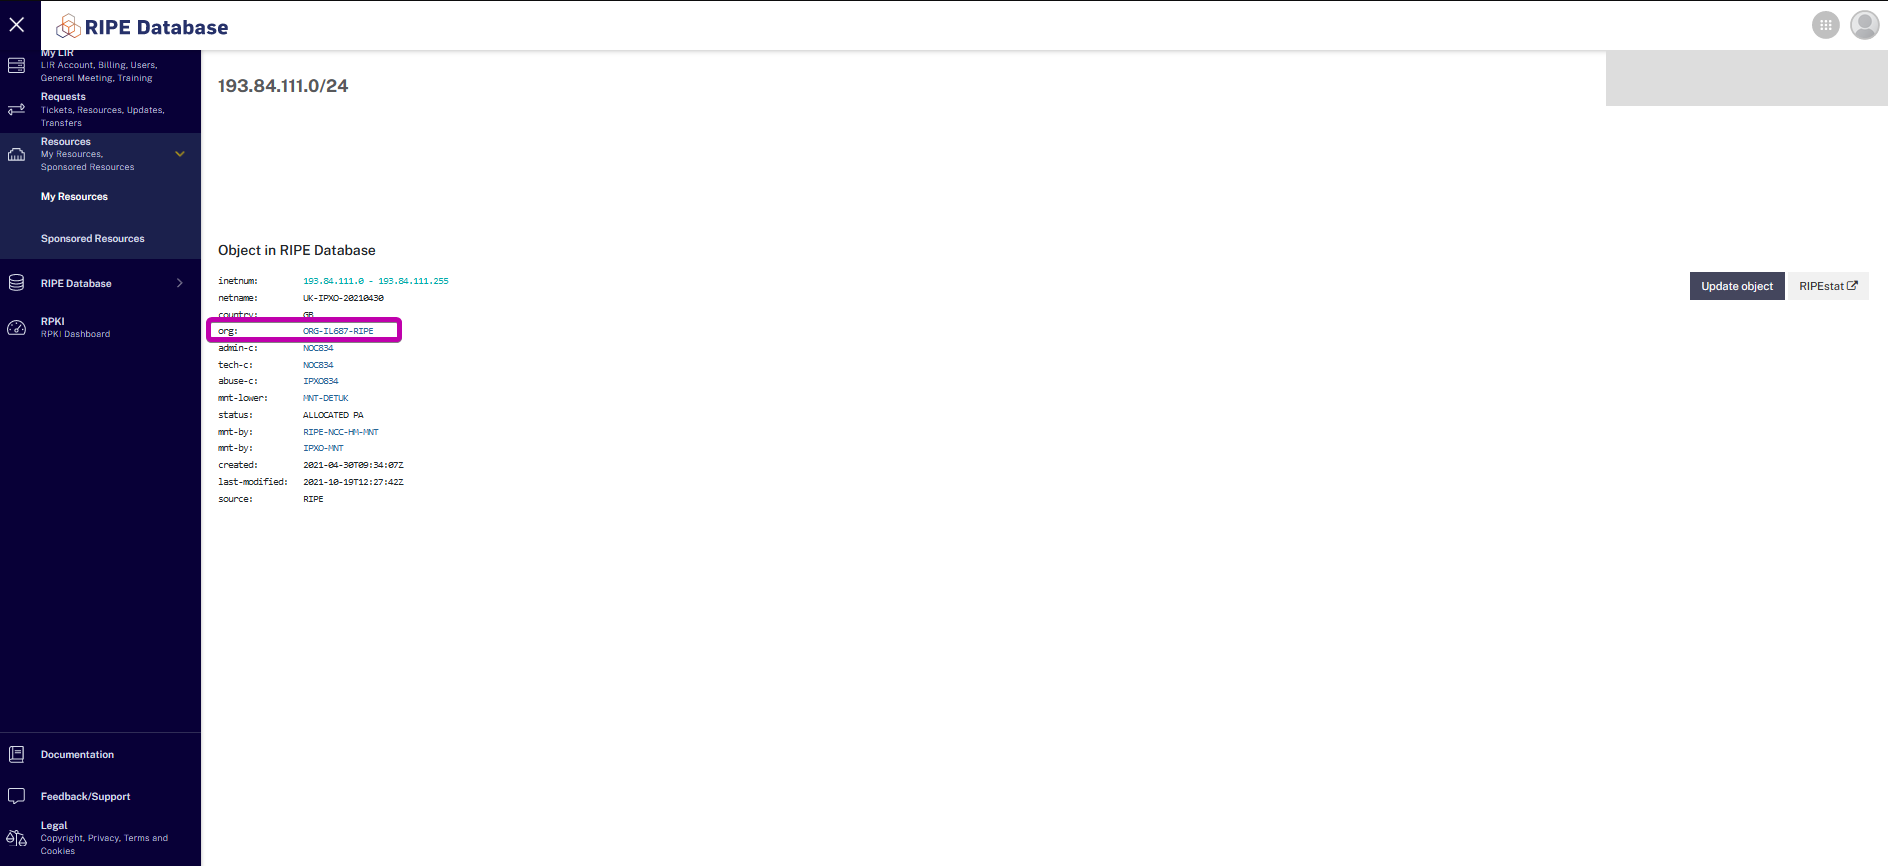
Note: If you want to edit your organization’s object, you can do that by clicking the Update object button on the right.

How to add org in RIPE when creating an inetnum object
To add an org, you need to create an inetnum. If you haven’t created it yet, follow these instructions to do it.
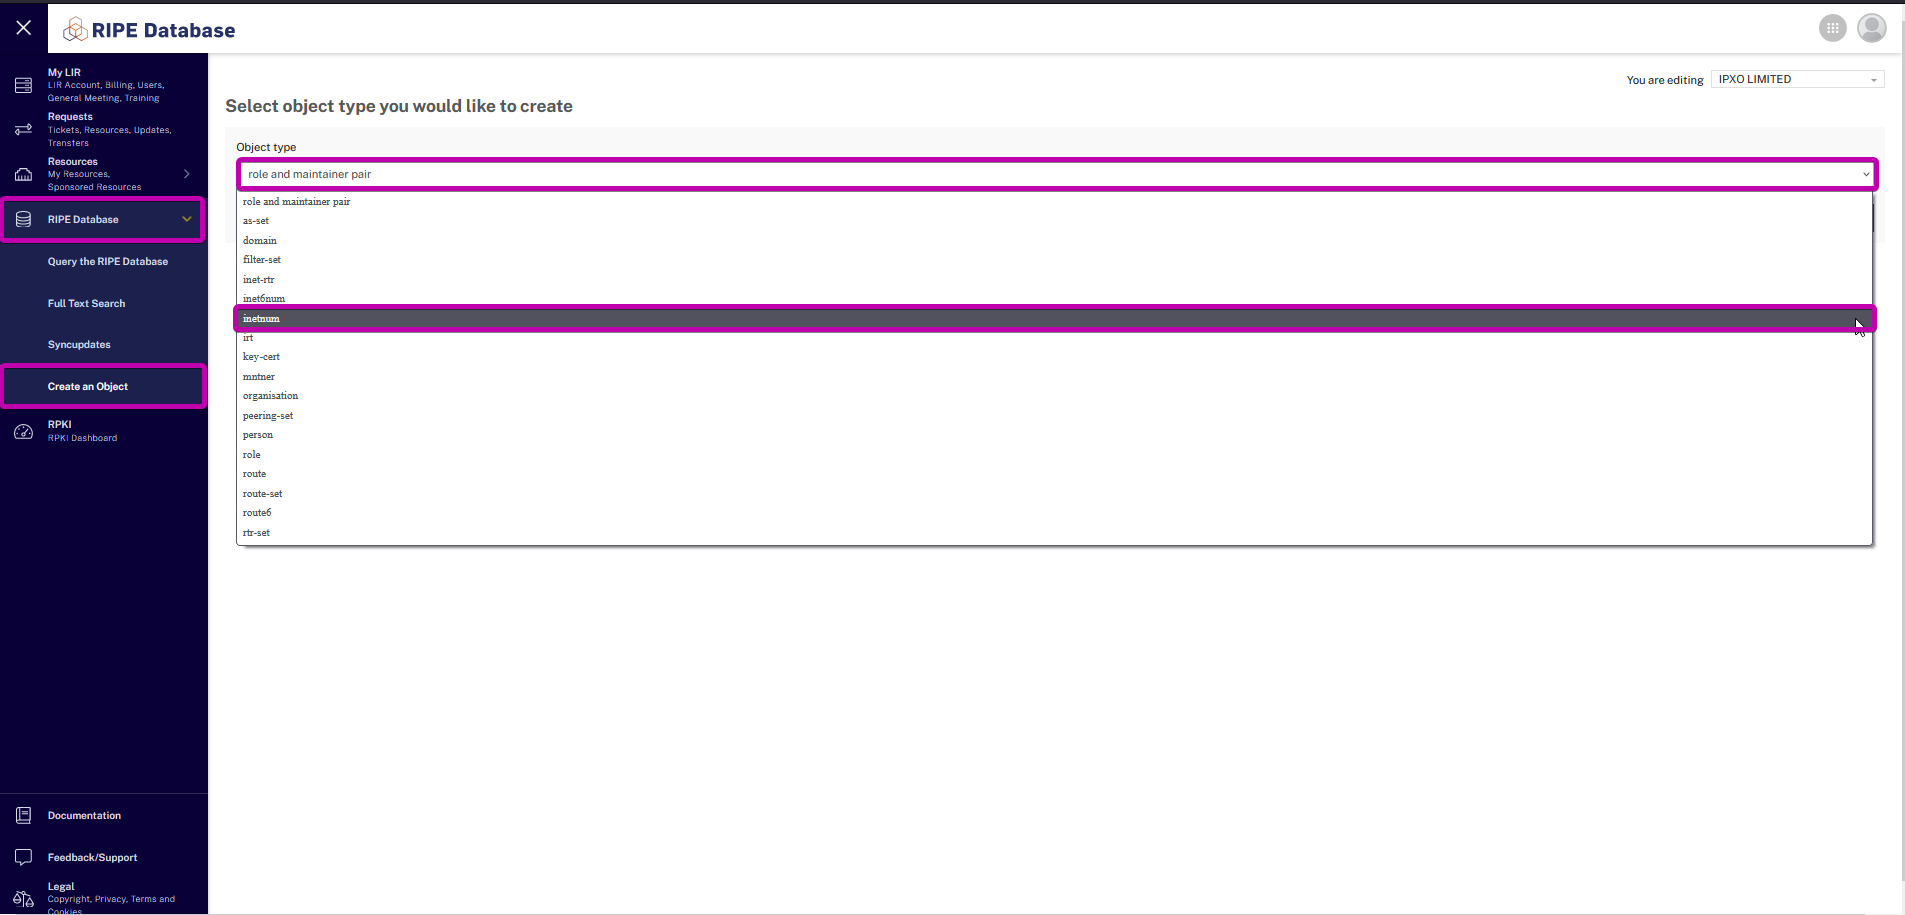
Step 1. Create a subnet inetnum object
Log in to your RIPE NCC Access account and open the RIPE Database. In the menu on the left, click Create an Object to access the Select object type you would like to create window. Expand the Object type menu and select inetnum.
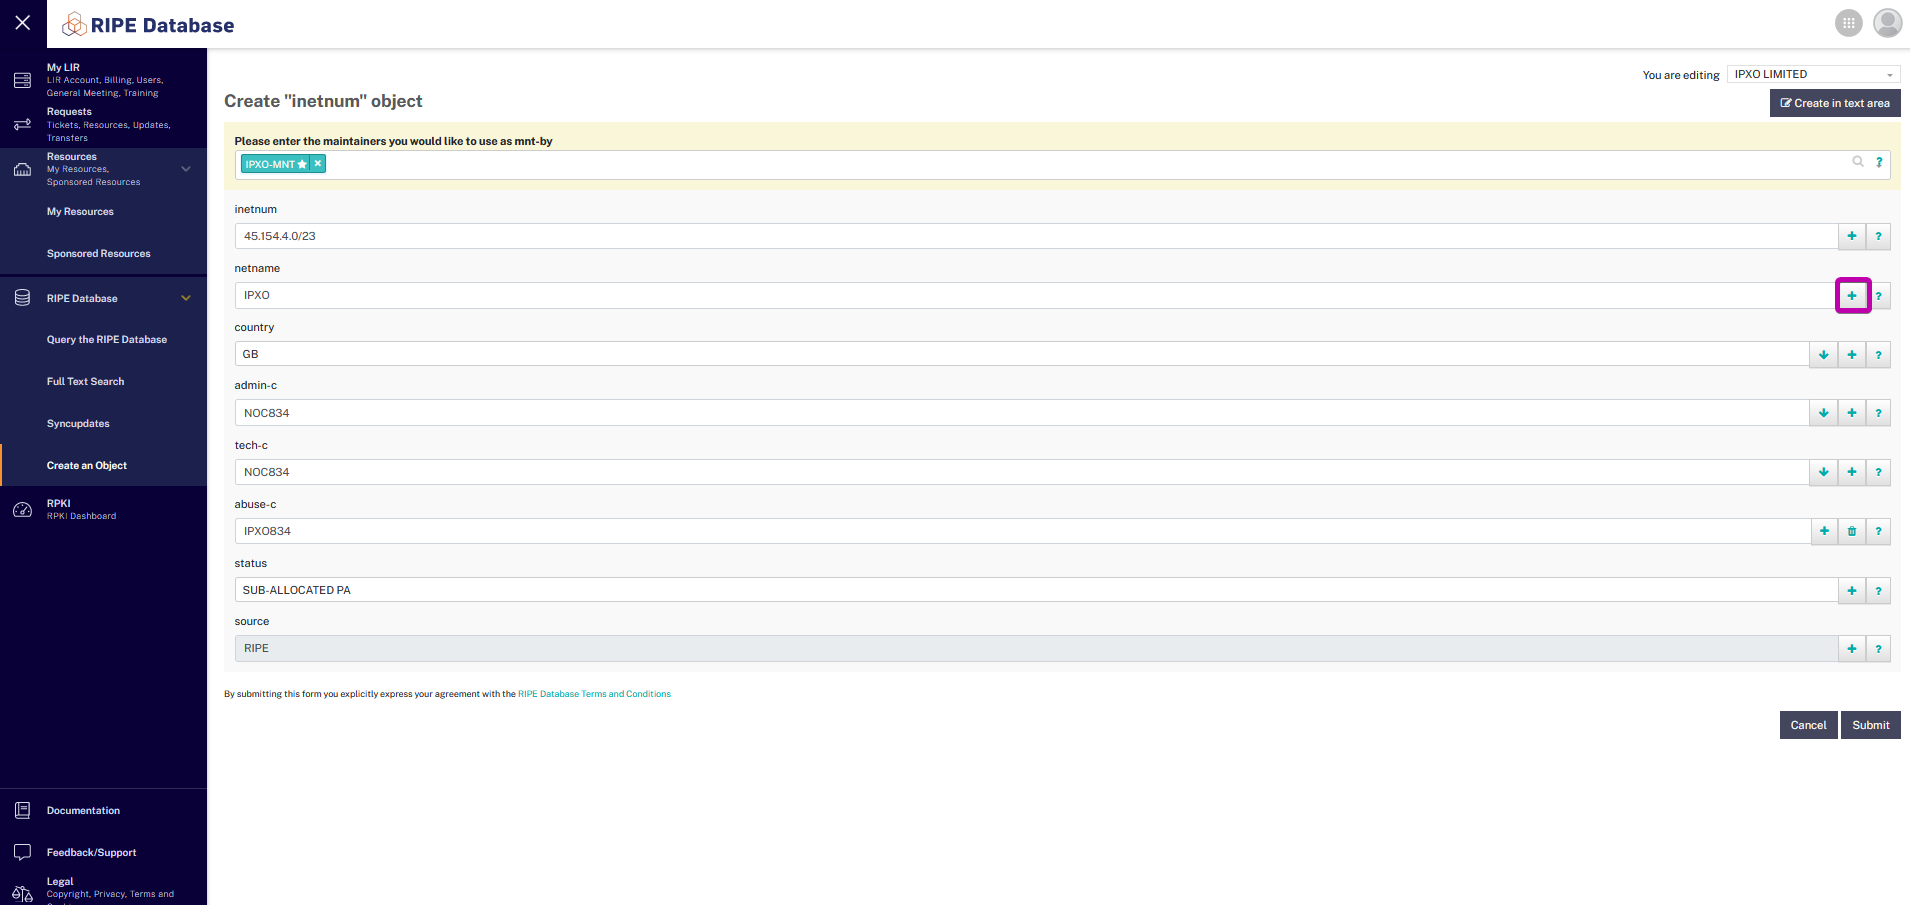
Enter any necessary inetnum information, such as:
Inetnum:
Netname:
Country:
Admin-c:
Tech-c:
Abuse c: IPXO834
Status:
Note: When creating the inetnum object, please make sure to select SUB-ALLOCATED PA as the status attribute.
Step 2: Add an attribute to the inetnum you have created
Click the + icon on the right of the netname.
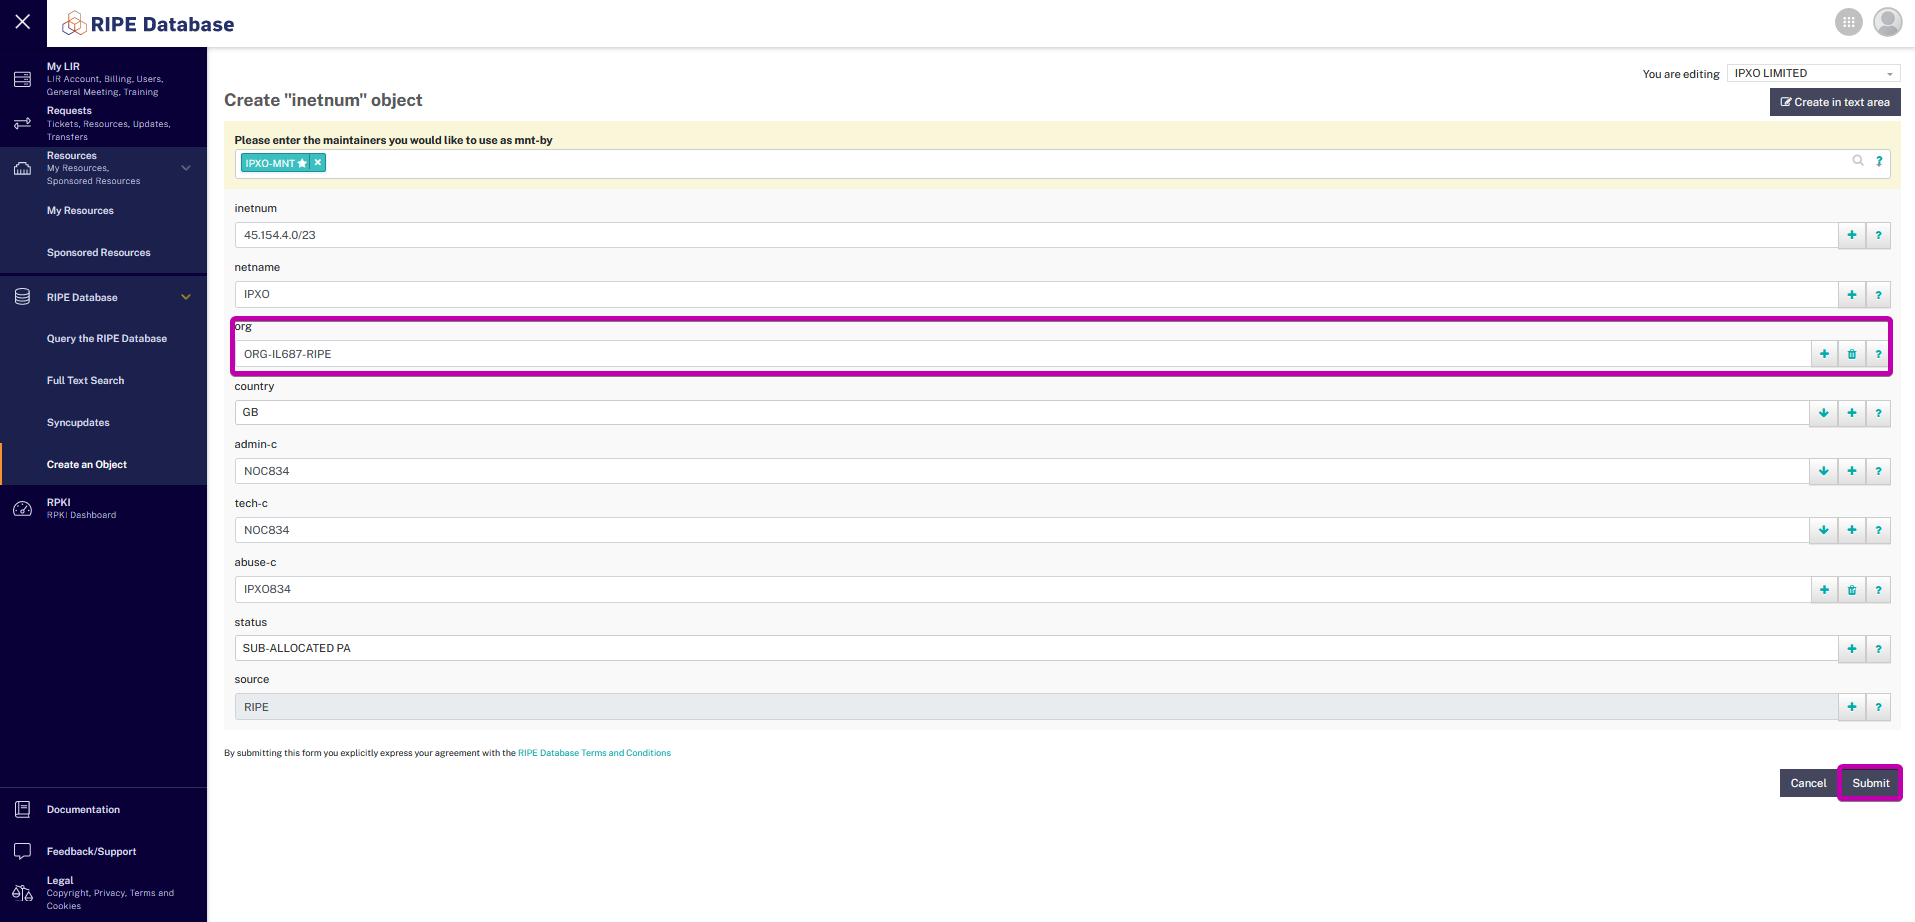
Note: As an example, we use the inetnum 45.154.4.0/23.
Step 3: Choose the org attribute
In the Choose attribute to insert drop-down menu, select org.

Step 4: Add your organization’s object
Add your organization’s object into the org field and then click Submit at the bottom.
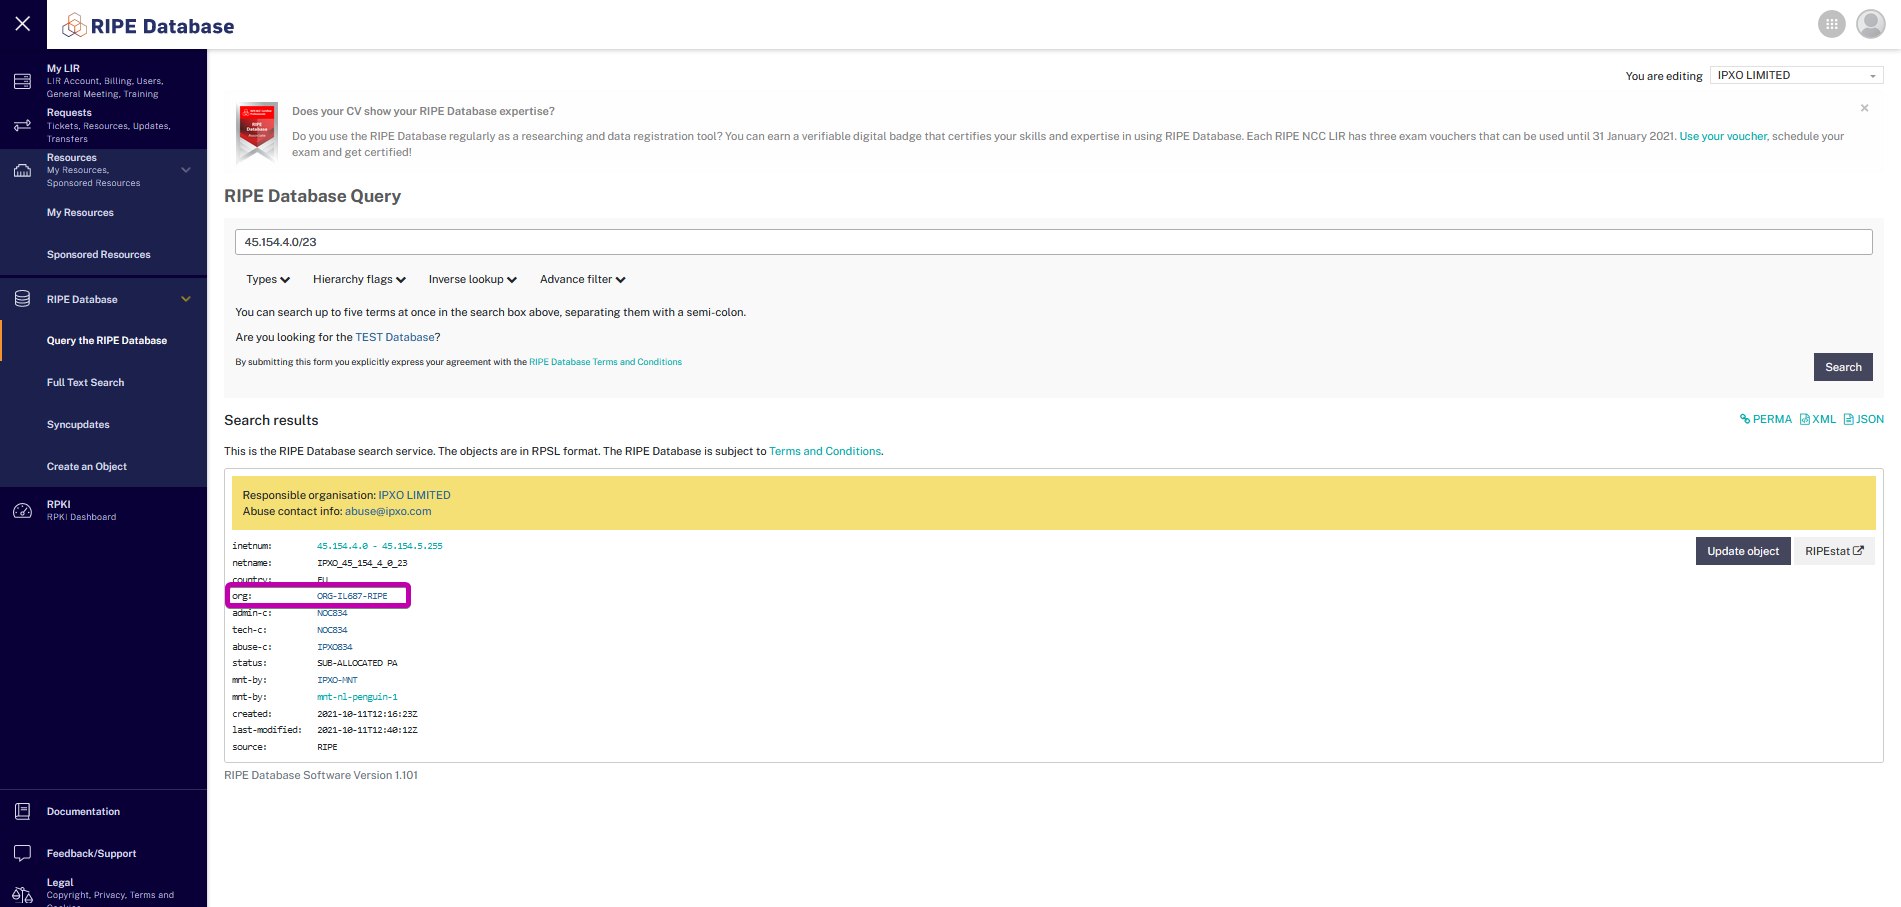
If you perform the steps correctly, your org will be visible in the org field of your object.
How to add org in RIPE to an existing inetnum object
If you want to add org to an existing inetnum object, please follow these instructions.
Step 1: Find the existing inetnum
Log in to your RIPE NCC Access account and open the RIPE Database. Click Resources in the menu on the left and then click My Resources. Select the inetnum object to which you want to add an org.
Note: As an example, we use the inetnum 185.34.40.0/22.
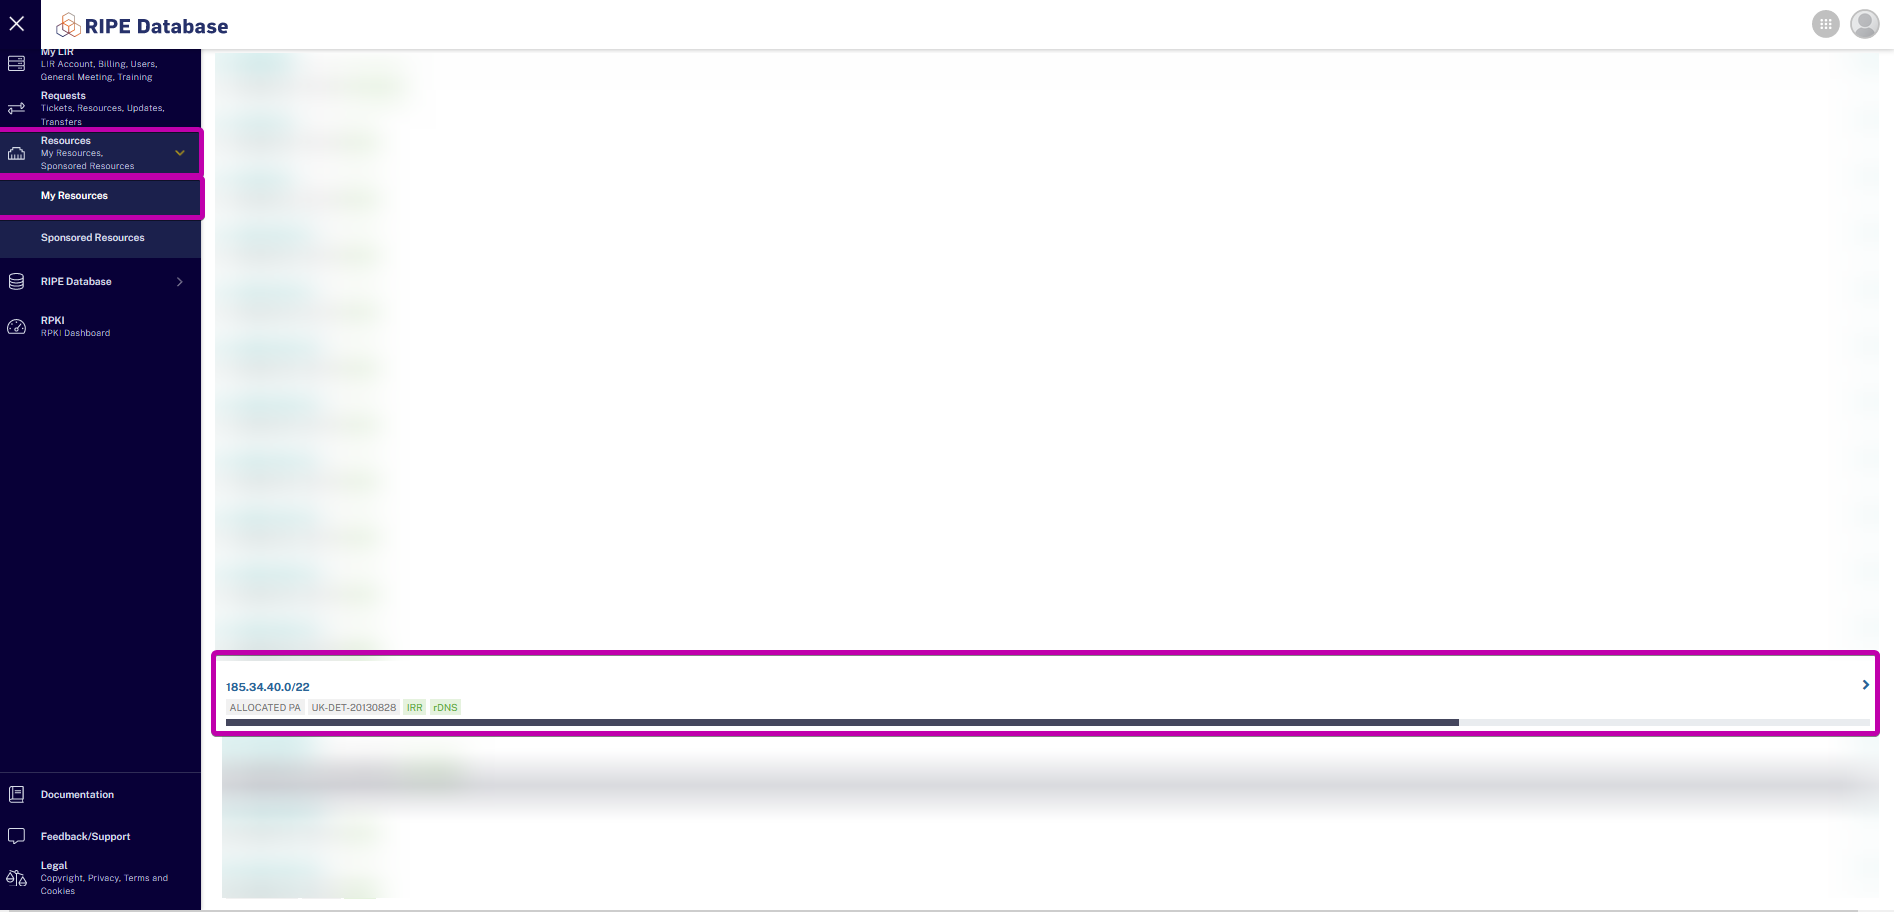
Step 2: Find the subnet
In the Object in RIPE Database menu, scroll down to the Internet number resource list. Click the subnet you choose.
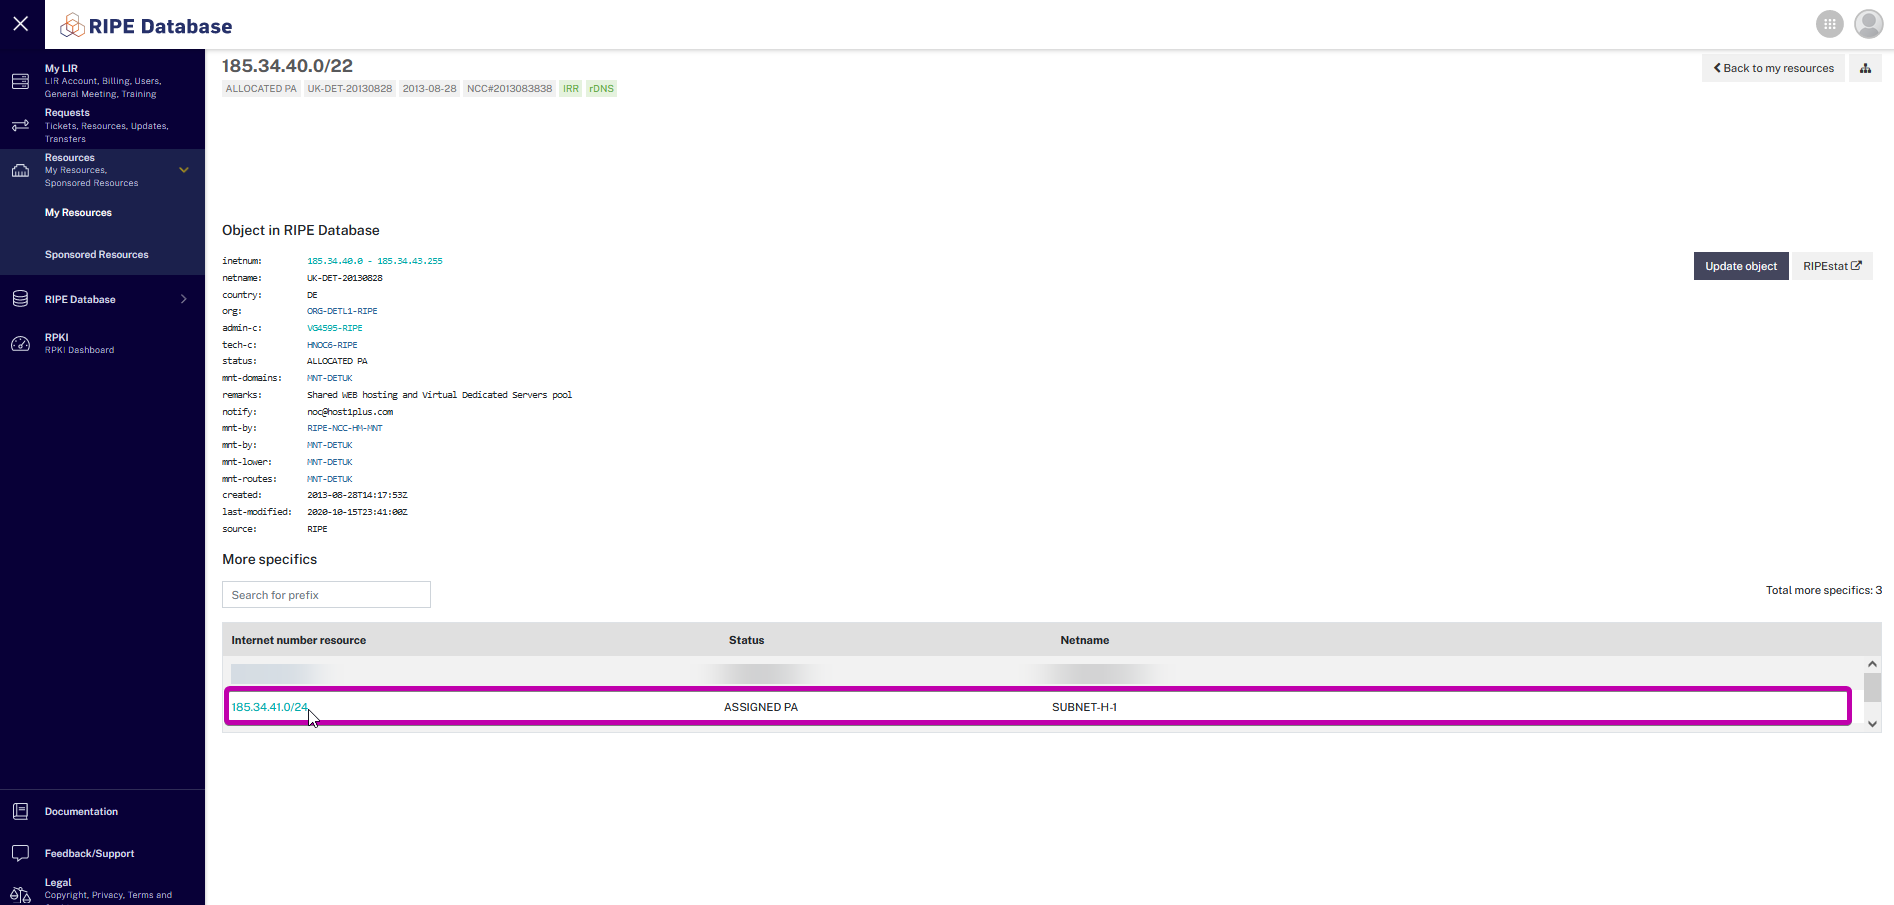
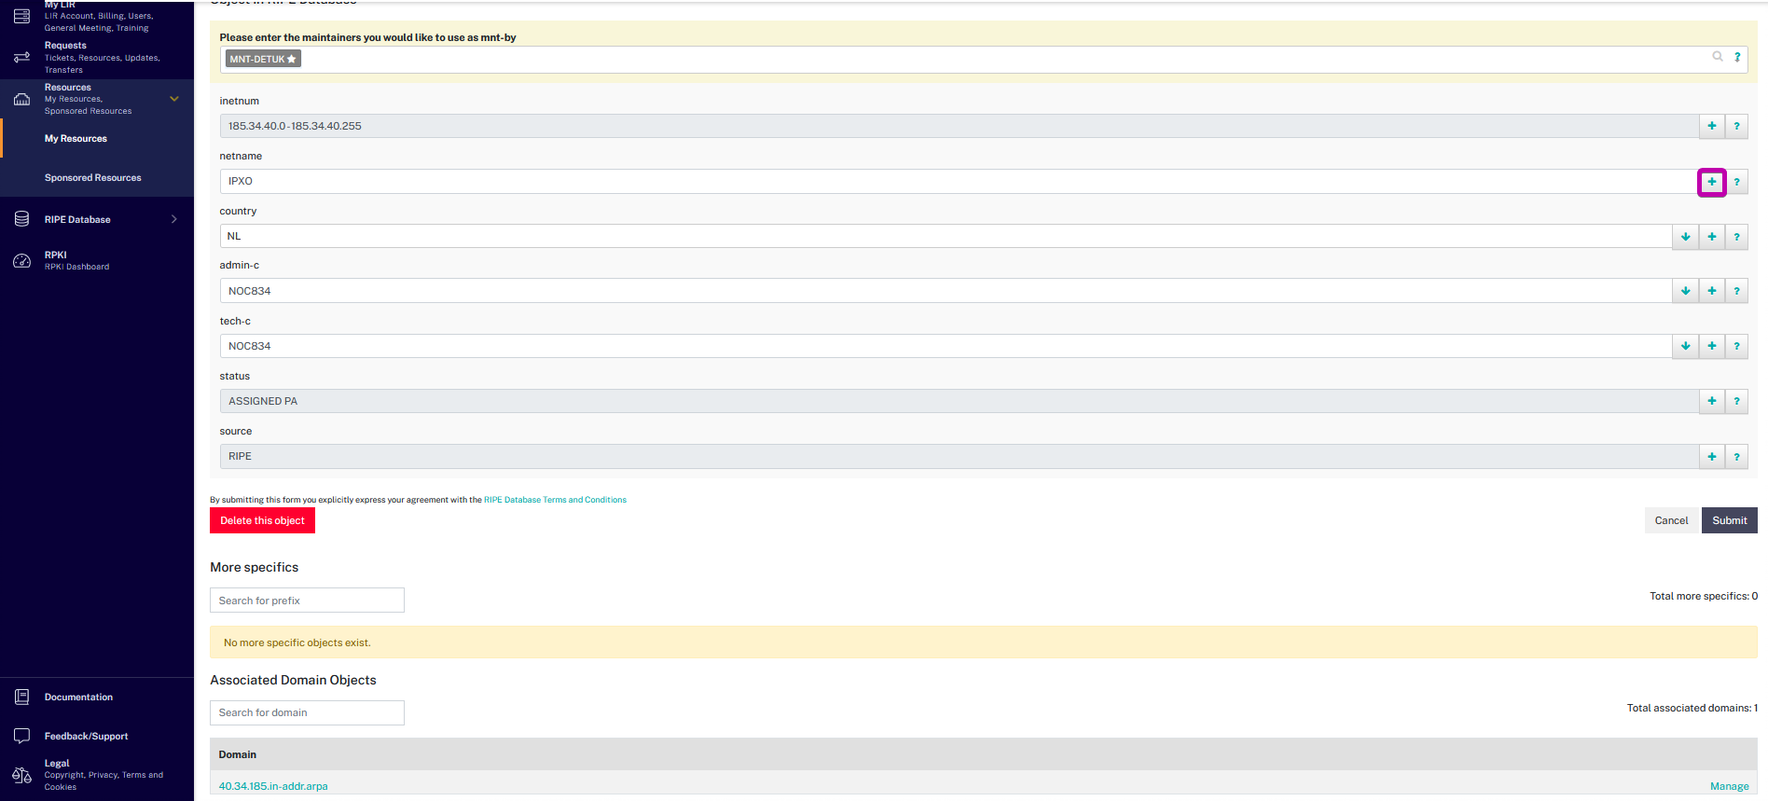
Step 3: Add an attribute to the existing inetnum
Click the + icon on the right of the netname.
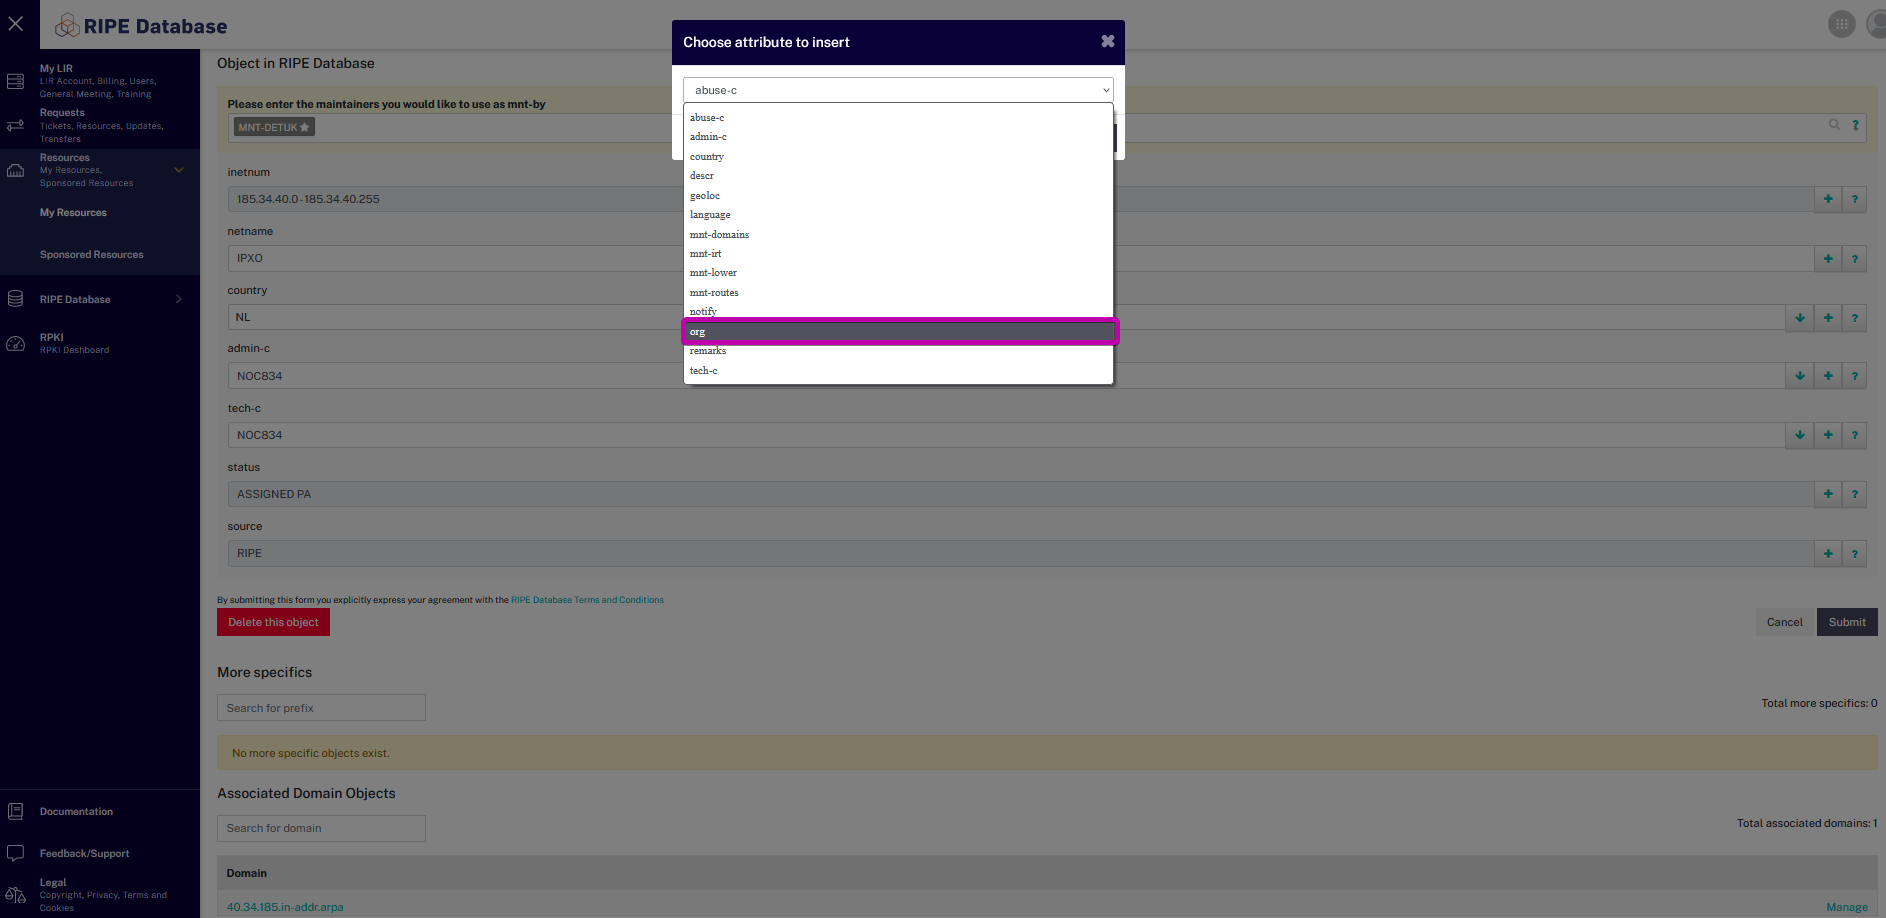
Step 4: Choose the org attribute
In the Choose attribute to insert drop-down menu, select org.
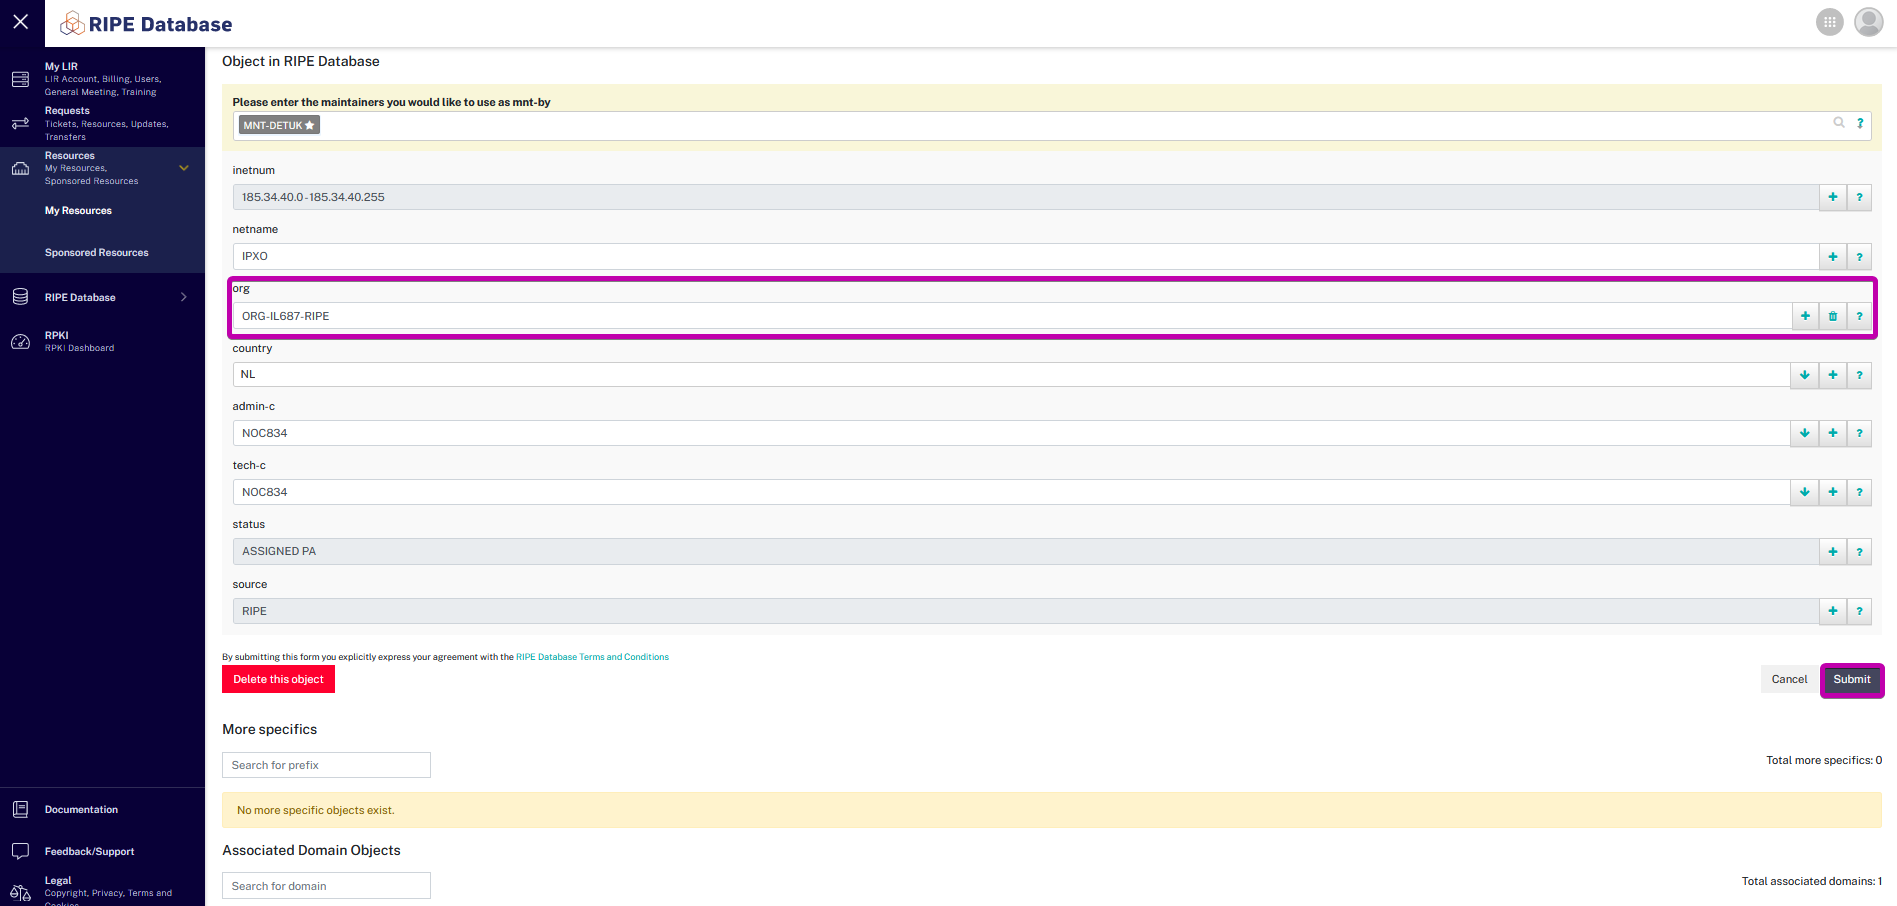
Step 5: Add your organization’s object
Add your organization’s object into the org field and then click Submit at the bottom.
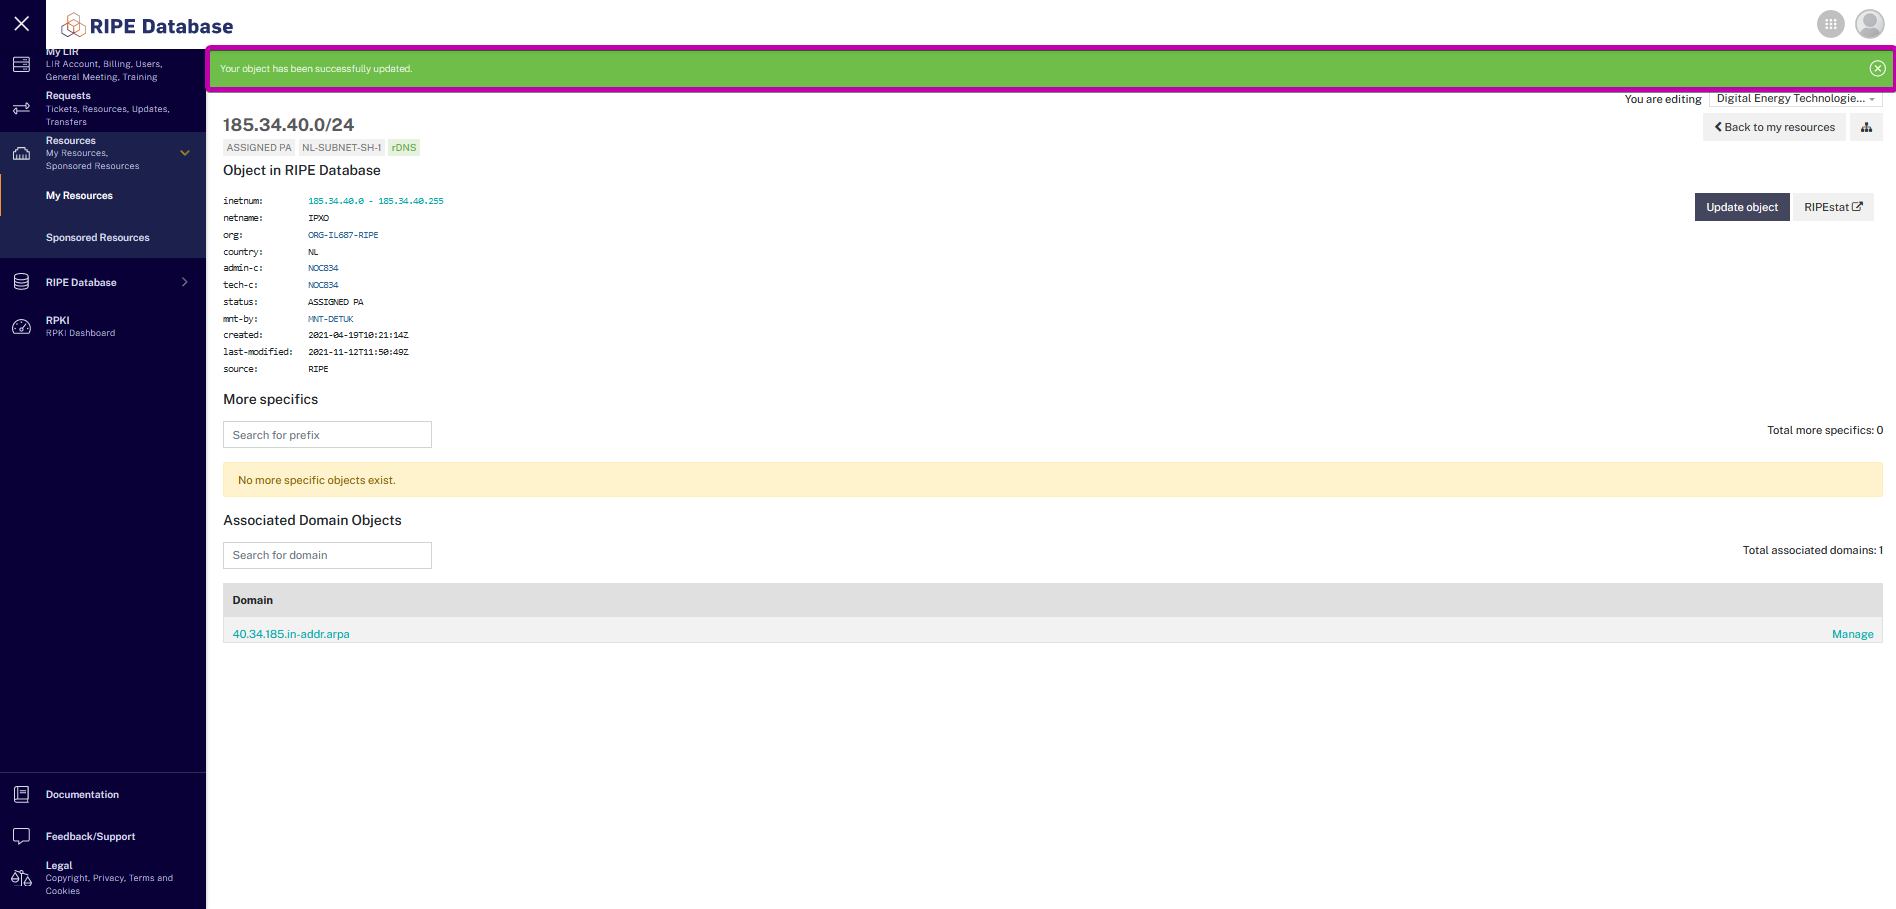
If you perform the steps correctly, you will be notified that the object was updated successfully.
If you have any questions, feel free to contact our Customer Support team via help.ipxo.com.
Contact Customer Solutions
If you have any questions, contact our Customer Solutions Team