How to Prepare Your Leased Subnet for AWS BYOIP
Follow this easy step-by-step guide and learn how to prepare the subnets you lease via the IPXO Marketplace for AWS BYOIP.
This guide covers only a portion of the AWS BYOIP process. You will learn how to assign Amazon ASN to your leased subnet and add the certificate. The part on how to retrieve the certificate is covered in the official AWS BYOIP guide.
Step 1:
Lease an IP address from the IPXO Marketplace. Since, Amazon AWS accepts IPs from RIPE, ARIN and APNIC, use this guide to find and lease IPs from these RIRs.
Step 2:
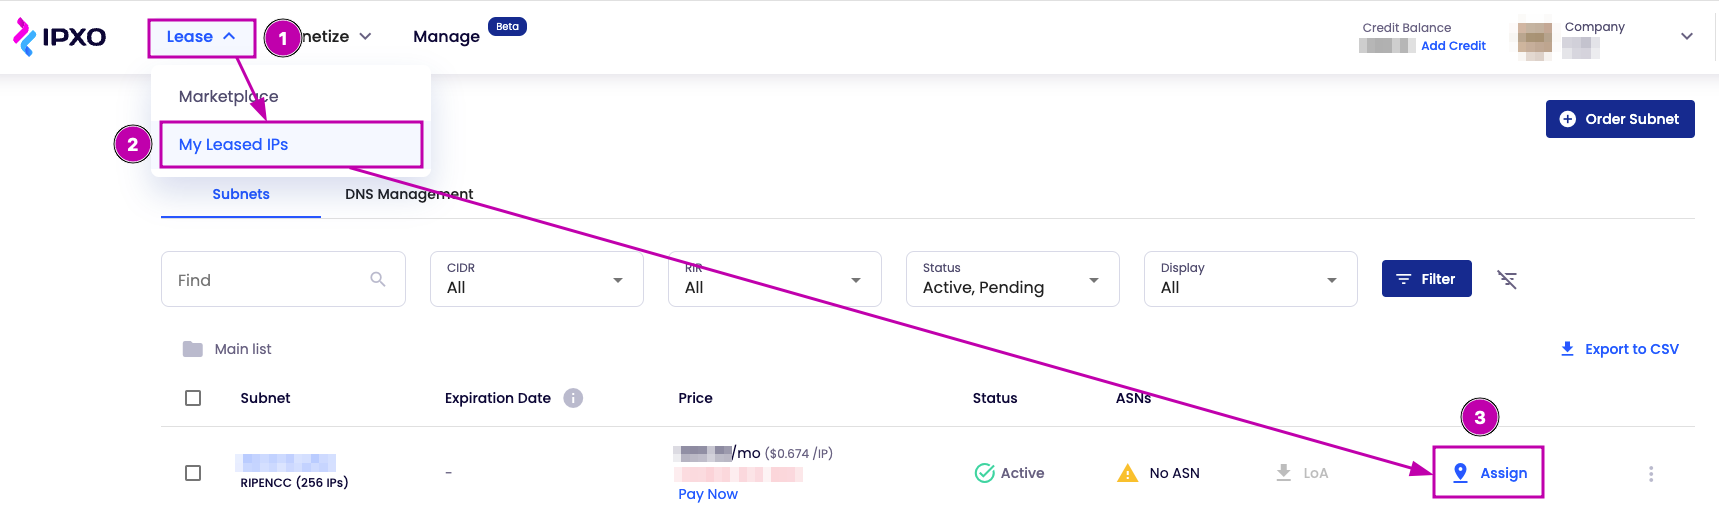
In IPXO portal , select ‘Lease’ (1) and click ‘My Leased IPs’ (2) from the dropdown menu.
Step 3:
Find your leased subnet that you want to bring to the AWS and click ‘Assign’ (3) on the right-hand side:
Step 4:
- Type in your company’s name in the ‘Company name’ field.
- In the ‘Add AS Organization’ you will need to assign two AS numbers of Amazon, this step is necessary since it allows Amazon to advertise your leased range. The two Amazon AS numbers are AS16509 and AS14618. Type them in separately and click ‘Add’ on the right side after each one of them. The result should look like this:

- Select ‘Issue ROA (-s) for the subnet (-s)’ and “Create WHOIS Inetnum/Net range” options In the ‘Additional actions needed for the transferable subnet (-s)’ as shown below:
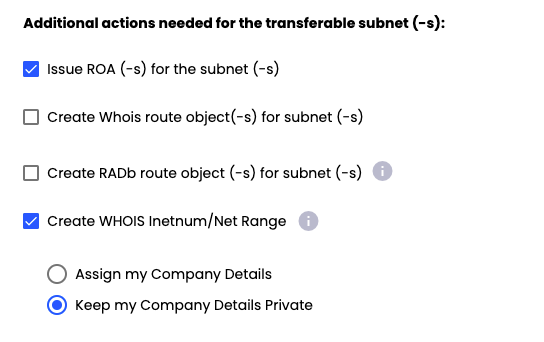
Make sure to de-select ‘Create RADb route object (-s) for subnets’ and ‘Create WHOIS route object (-s) for subnets’ options.
Important: If you are onboarding a range from APNIC, once sending the certificate (it will be covered in step 5), ask the Customer Solutions Team to create an inetnum for you.
Step 5:
Go to the AWS BYOIP guide section “1. Create a private key and generate an X.509 certificate” and follow the instructions to generate a certificate. Send the certificate that you have generated from the AWS BYOIP guide to the IPXO Customer Solutions Team.
Important: Skip steps 2 and 3 in the AWS BYOIP guide. Although the AWS guide instructs you to create ROA and IRR, you don’t need to worry about creating your records – IPXO team will handle it for you and you will be informed via email once this happens.
Step 6:
Proceed with the BYOIP AWS guide, section “Onboard your BYOIP” after receiving an e-mail from the IPXO team to notify you about successful ROA and route object creation.
If you have any questions, do not hesitate to contact us via help.ipxo.com.
Contact Customer Solutions
If you have any questions, contact our Customer Solutions Team