Preparing the Subnet Before Placing It in the IPXO Marketplace (RIPE)
Learn how to prepare your subnet before adding it to the IPXO Marketplace.
If you wish to add your RIPE allocated subnet to the IPXO Marketplace, you need to prepare it accordingly. Follow these instructions to learn how to do it.
Note: If you know your subnet’s inetnum status, you can jump to Step 2:
Step 2A: If your subnet has Allocated PA status and is bigger than /24
Step 2B: If your subnet has Allocated PA status and is equal to /24
Step 1: Check your subnet’s status
You need to check your subnet’s WHOIS information to find the details about your subnet status. Use the Adding Subnets to IPXO From RIPE guide to find the list of statuses accepted in the IPXO Marketplace.
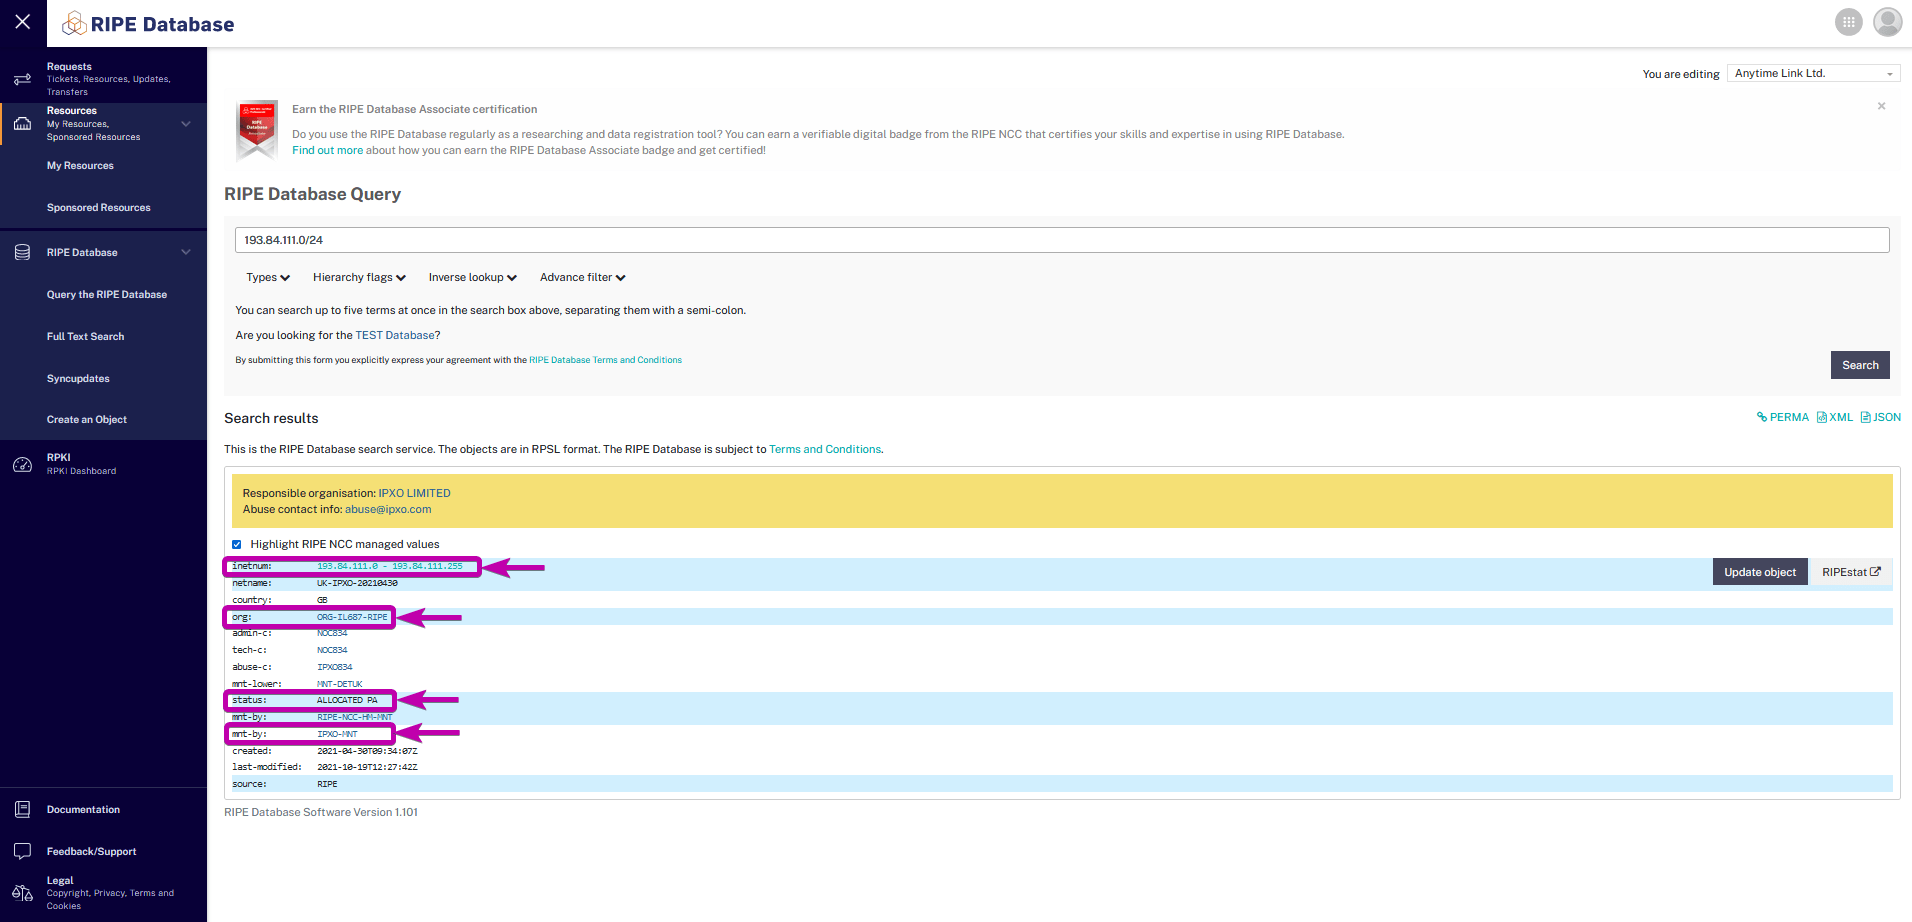
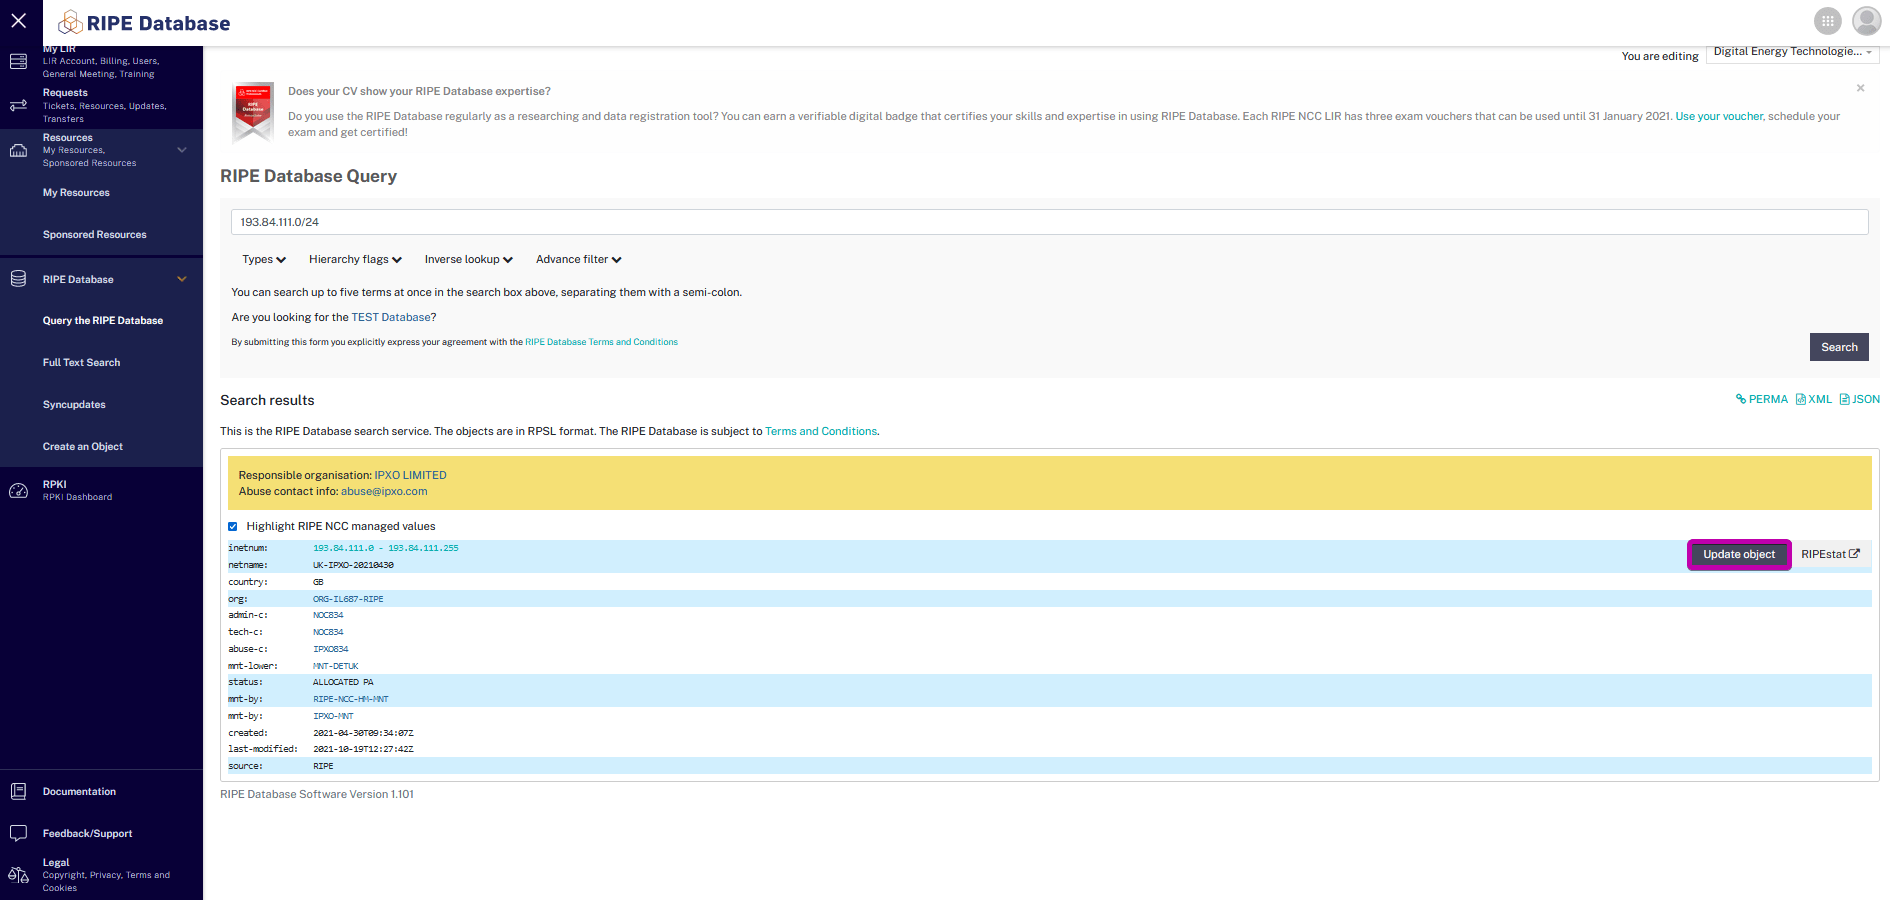
To find the details about the inetnum, use the RIPE Database Query service. Enter the subnet into the search term field and click Search. To demonstrate, we use the subnet 193.84.111.0/24.

See the image below to see how the result should look like. The arrows point to the object attributes necessary for placing the subnet in the Marketplace.
Step 2: Select Step 2A or Step 2B according to your subnet’s status
Follow Step 2A if your subnet has Allocated PA status and is bigger than /24.
Go to Step 2B if your subnet has Allocated PA status and is equal to /24.
Step 2A: Create a more specific inetnum when the subnet has Allocated PA status and is bigger than /24
If the subnet’s inetnum status is ALLOCATED PA and it is larger than /24 (subnet mask is smaller than 24), you have to create smaller (more specific) inetnums. This is required so that IPXO-MNT could be added as the maintainer of the inetnum, which would enable us to perform certain automation tasks. To demonstrate, we use the subnet 185.34.40.0/22.

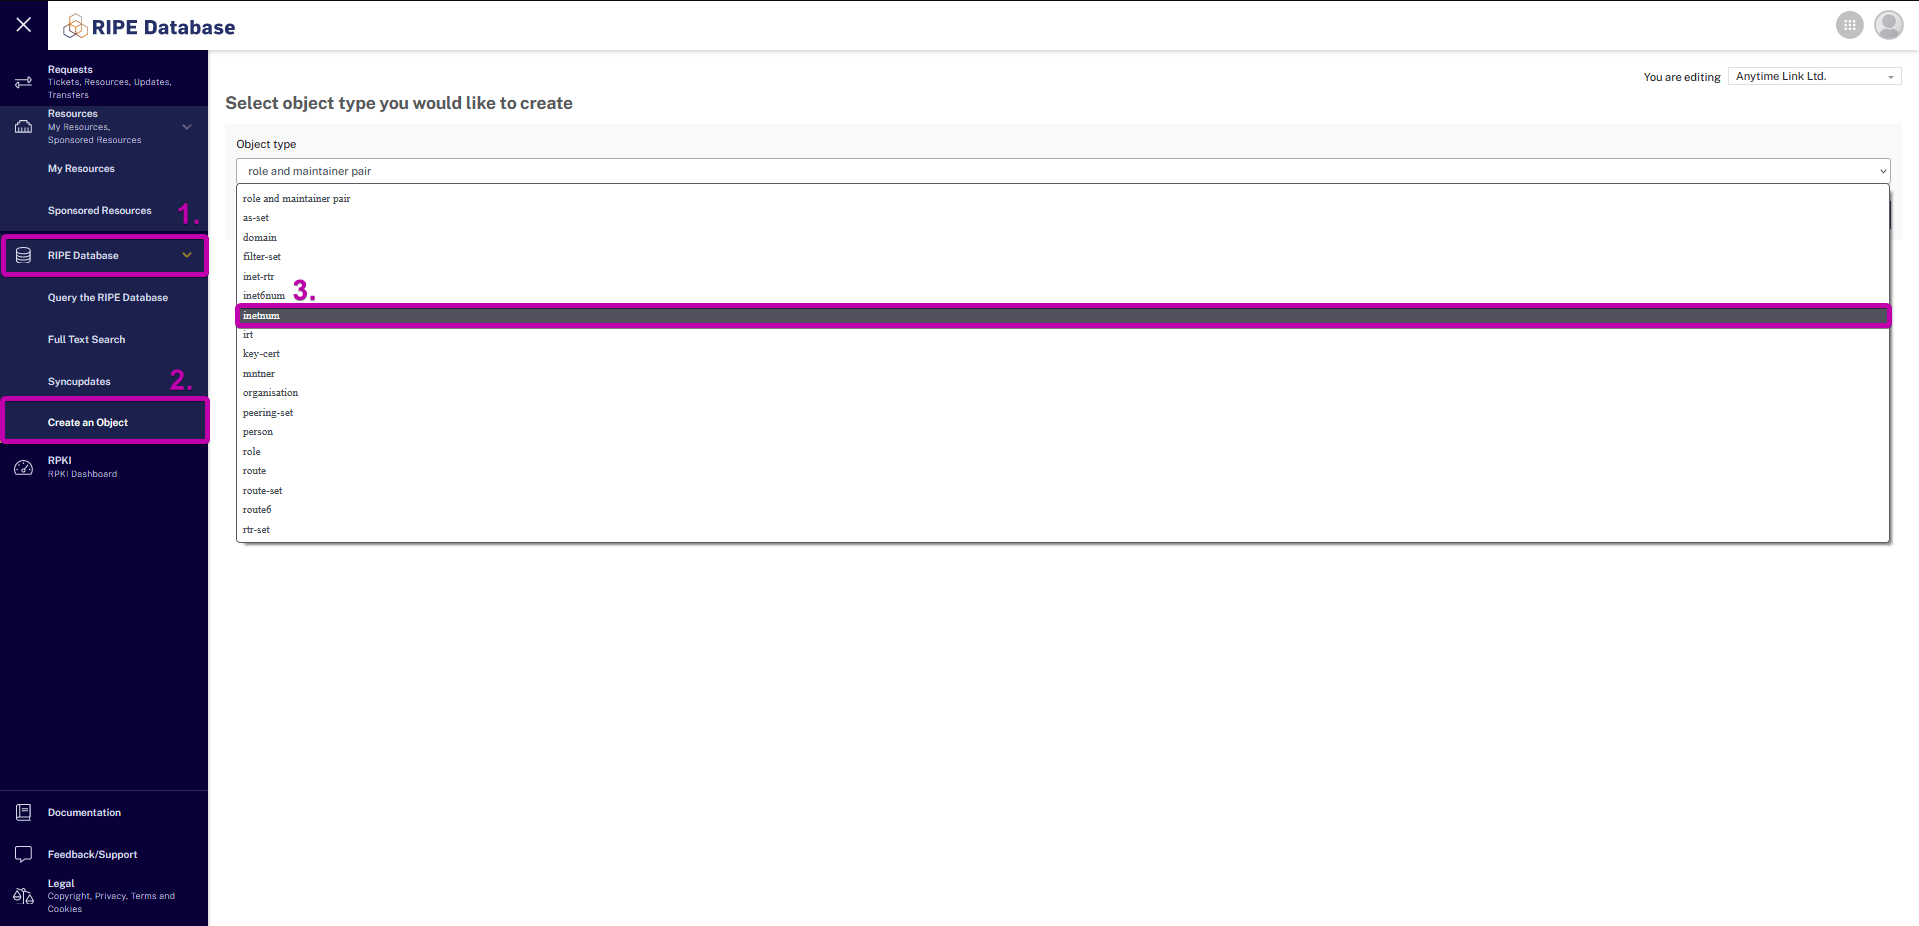
1. Log in to your RIPE NCC Access account, go to RIPE Database -> Create an Object and select inetnum from the Object type list.
2. Fill in the information and make sure to select the SUB-ALLOCATED PA value as the status attribute. Also, add the ORG and our Abuse contact. To add additional attributes, click the + sign next to an existing attribute. Once you’re done, click Submit at the bottom.
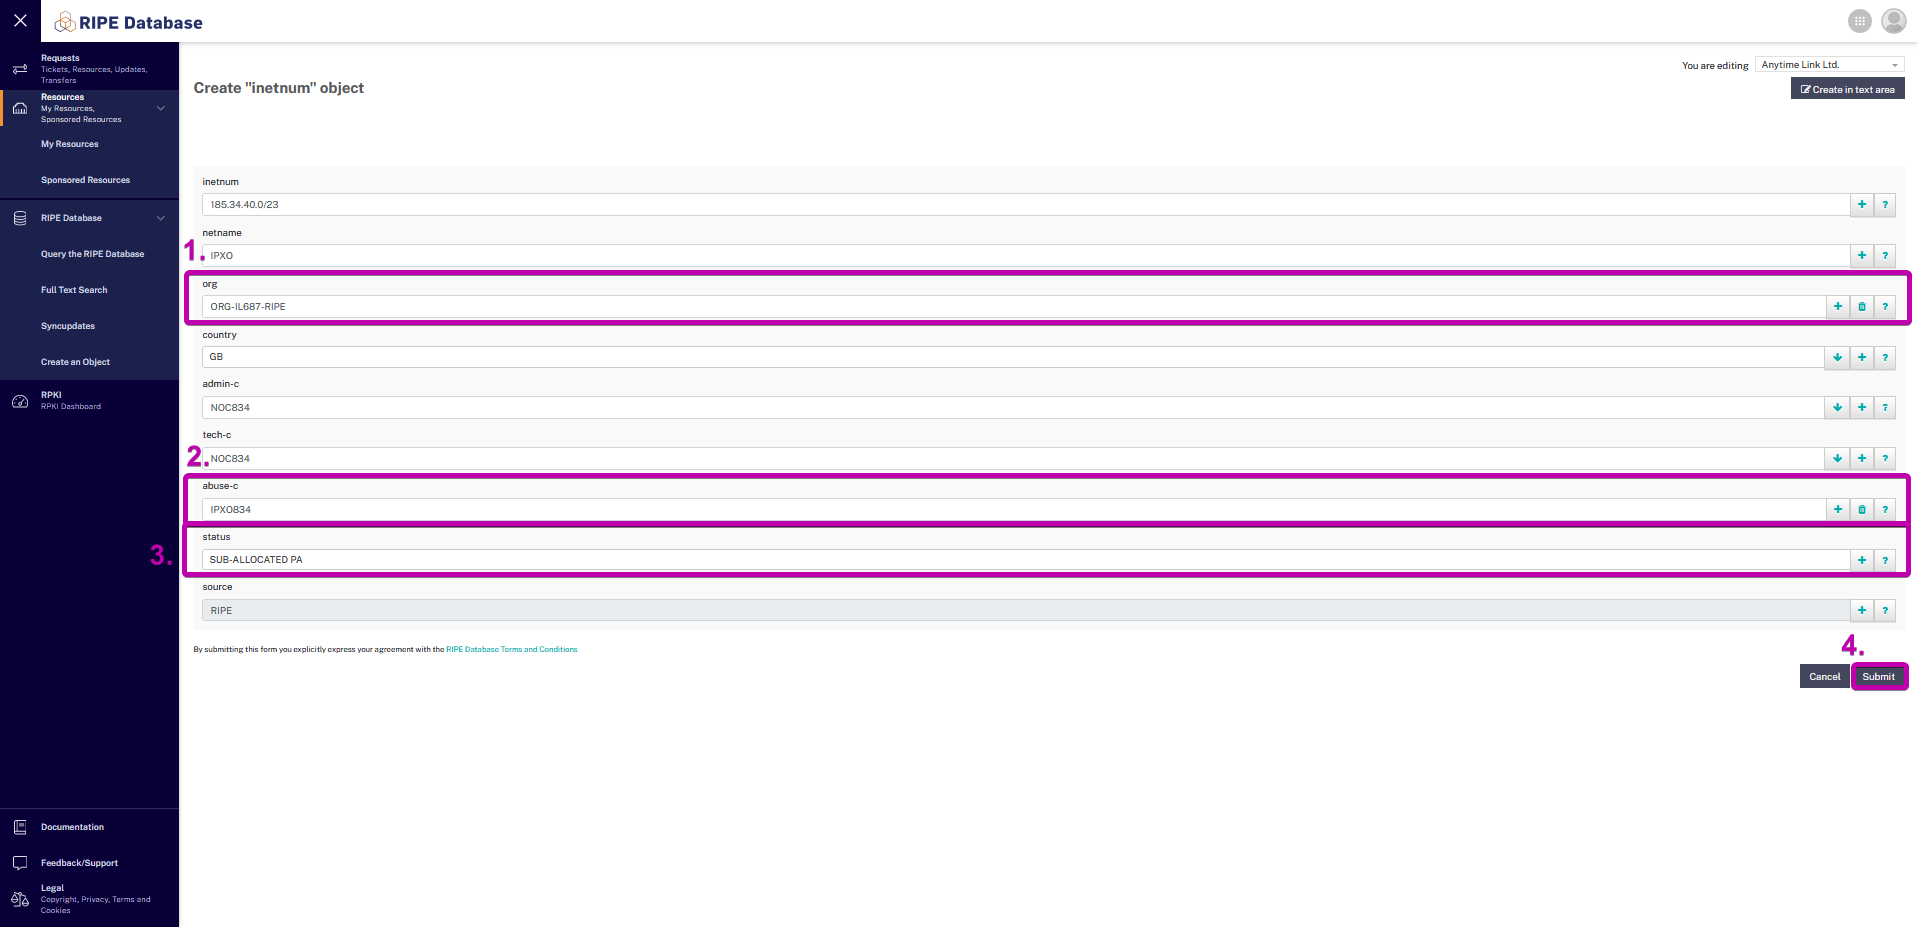
You can find the definitions of the attributes here and here.
Note: Use your organization’s code as denoted in RIPE WHOIS (the parent inetnum should have this org attribute value denoted automatically) as the value. Follow How To Add an Organization’s Object (org) To the RIPE Inetnum and How to Set Abuse Contact for RIPE guides for more information.
3. Click Modify to modify the inetnum you have just created.
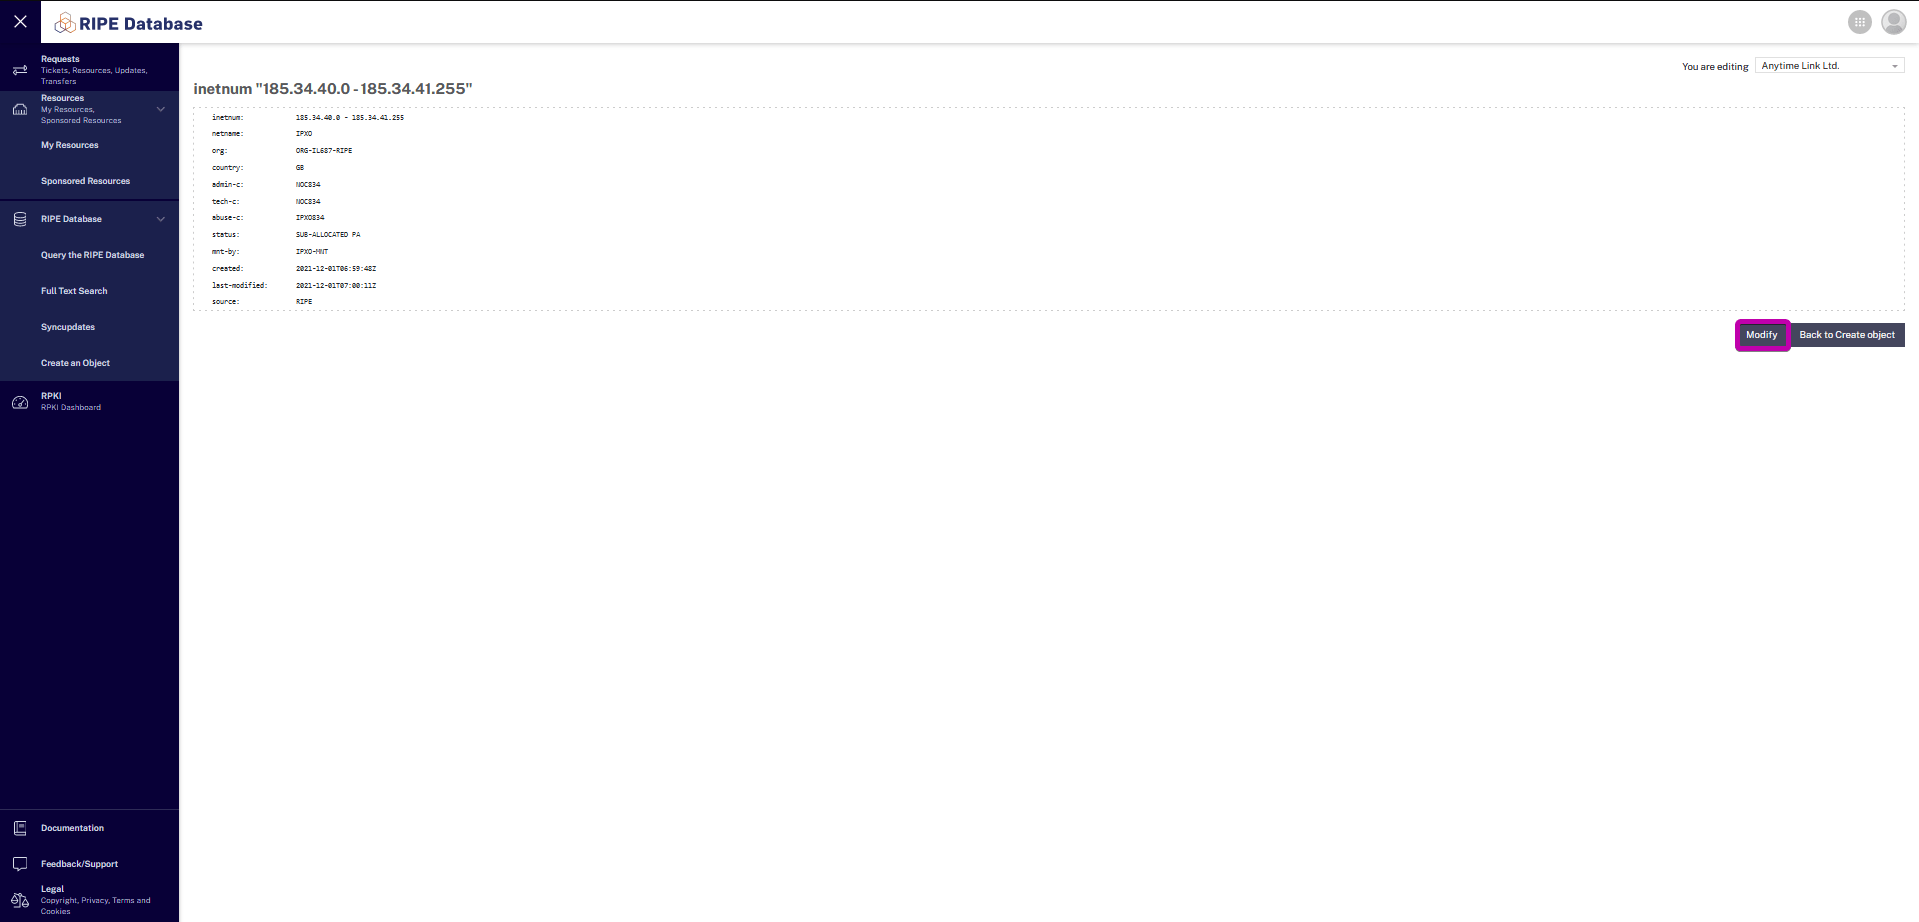
4. Add mnt-by attribute with the IPXO-MNT value (required so we could perform WHOIS changes automatically).
Note: Inetnum must exist before you can add additional mnt-by fields; otherwise, a password will be required

Once you create the more specific inetnums and add org and mnt-by attributes, please place these freshly created inetnums (with status SUB-ALLOCATED PA) in the Marketplace instead of the original inetnum (with status ALLOCATED PA).
Step 2B: Create a more specific inetnum when the subnet has Allocated PA and is exactly /24
If the subnet’s inetnum status is ALLOCATED PA and the subnet is /24 (subnet mask is equal to 24), add an abuse contact and add IPXO-MNT as mnt-lower, mnt-domains, mnt-routes. To demonstrate, we use the subnet 193.84.111.0/24.

1. Use the RIPE Database Query service to access the subnet’s WHOIS information. Click Update object on the right to update the inetnum.
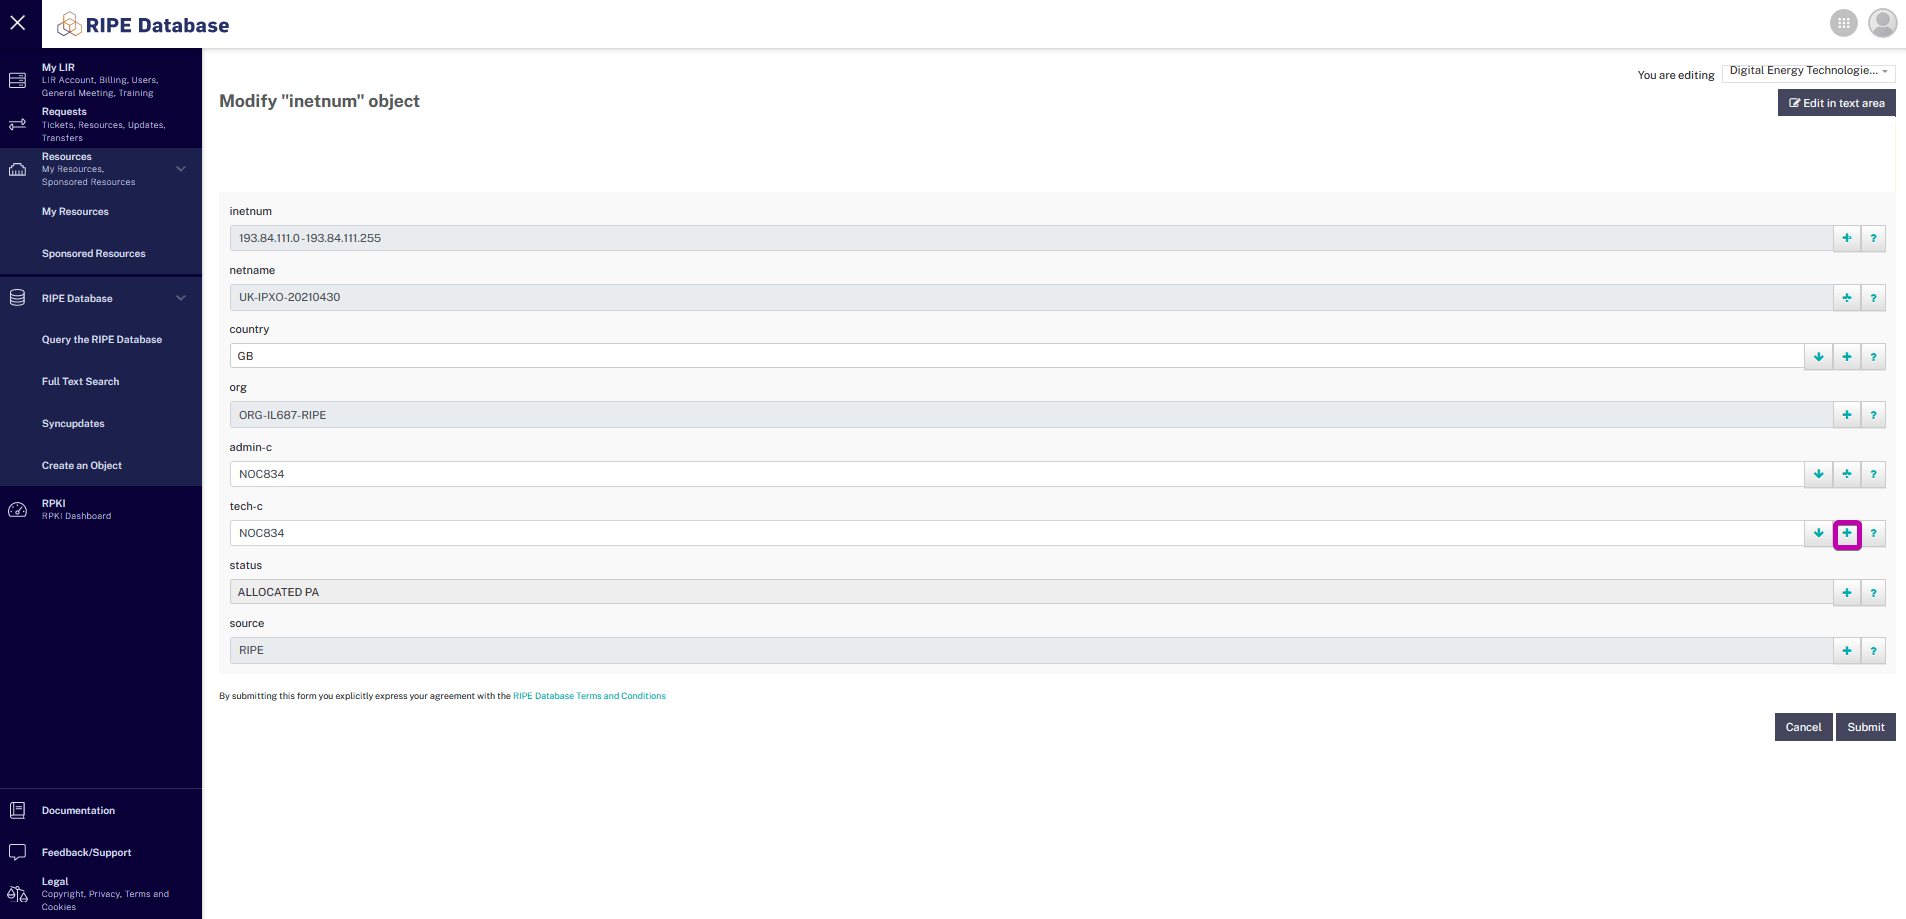
2. Click the + icon on the right of tech-c.
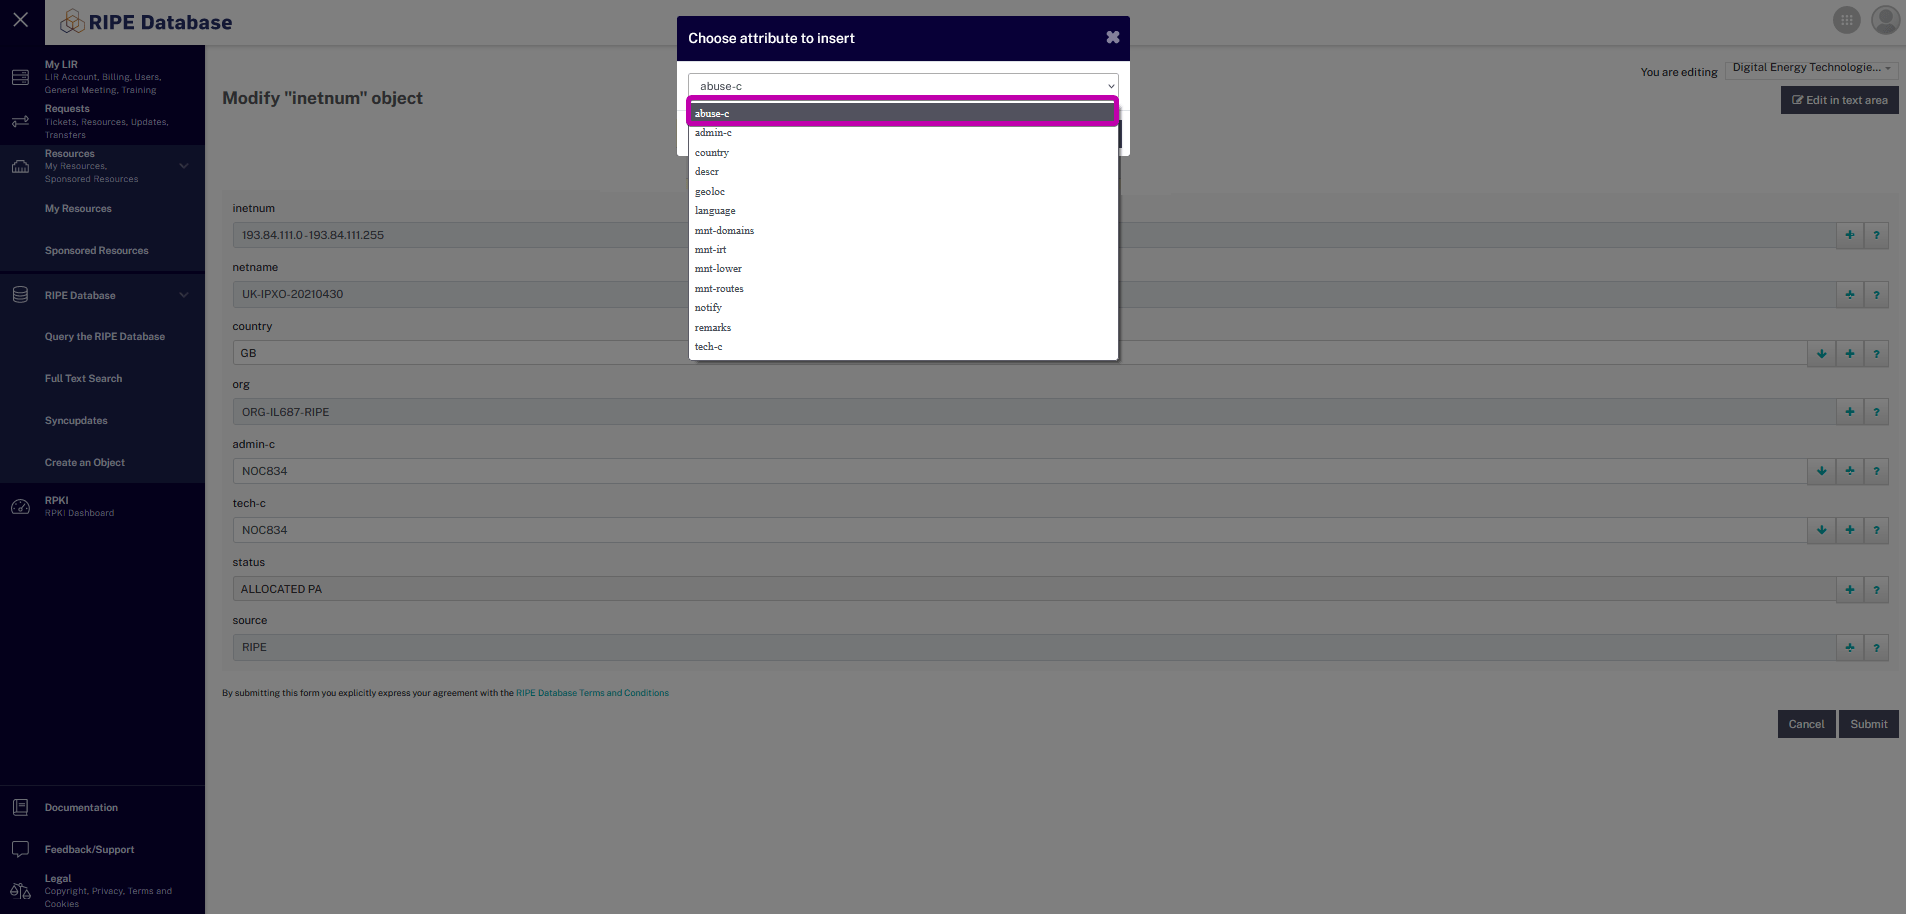
3. In the Choose attribute to insert drop-down menu, select abuse-c.
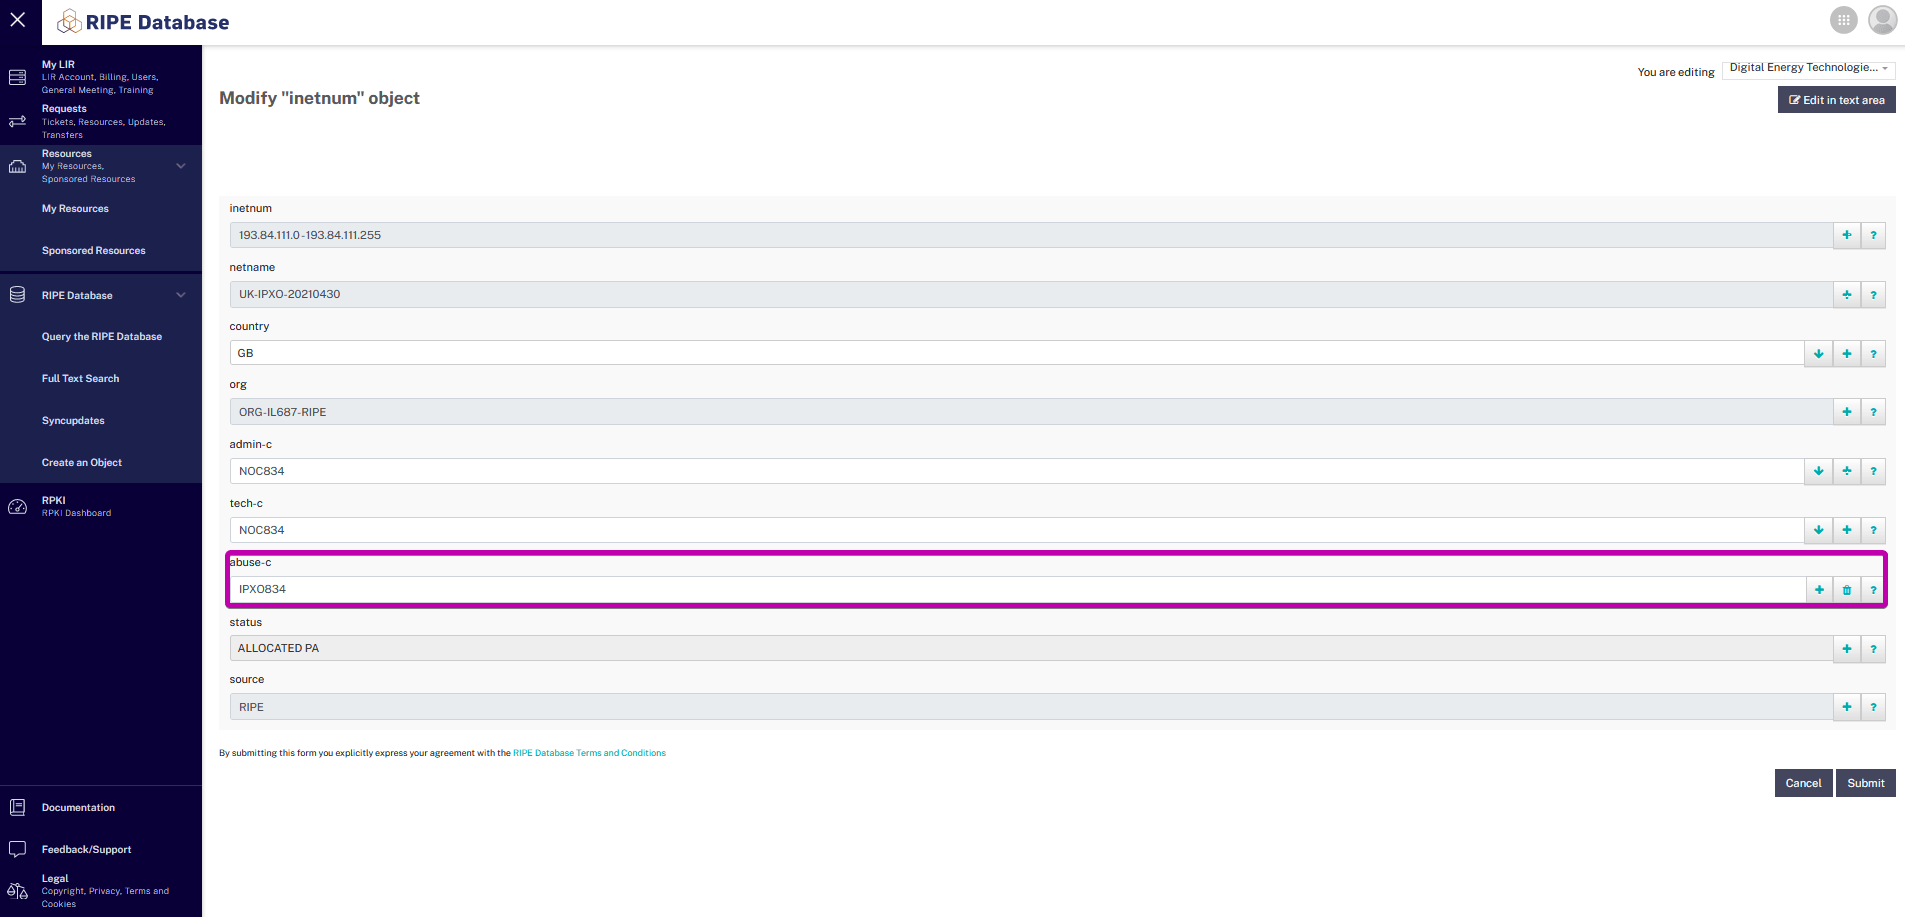
4. Add our abuse contact IPXO834 in the abuse-c section.
5. Click the + icon on the right of abuse-c.
Note: Follow the How to Set Abuse Contact for RIPE guide to learn how to set the abuse contact.

6. In the Choose attribute to insert drop-down menu, select mnt-domains.

7. Add IPXO-MNT in the mnt–domains section.
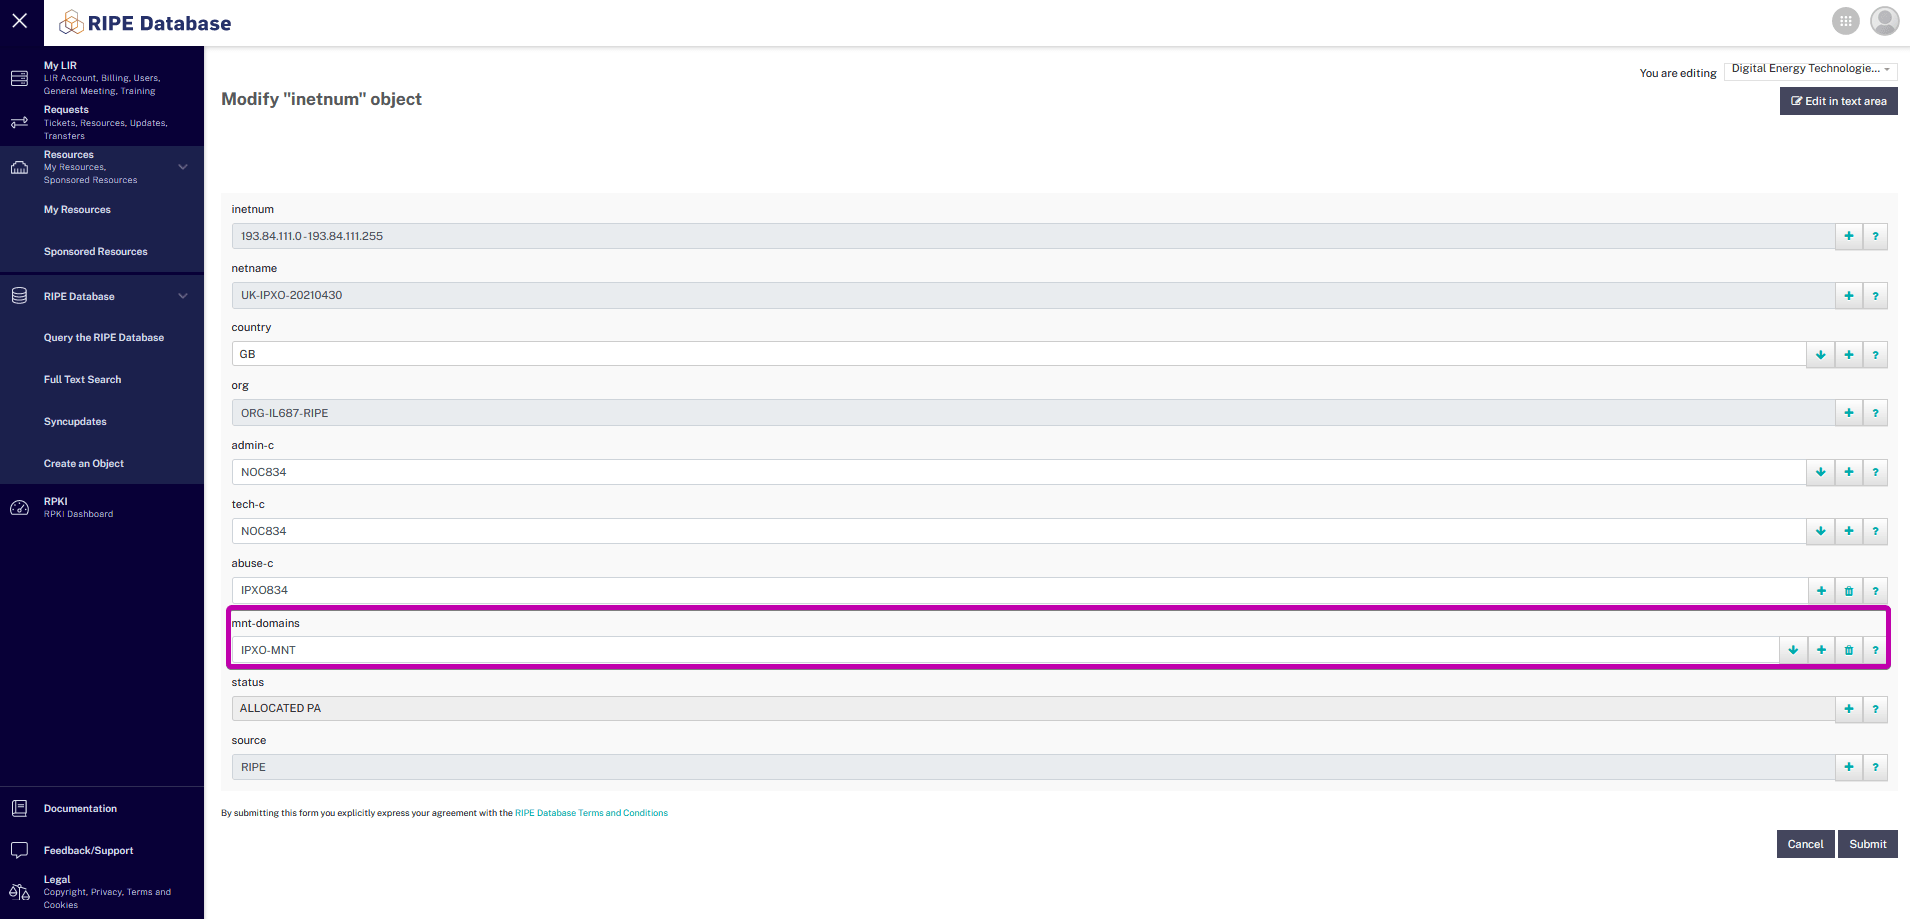
8. Finally, add mnt-lower and mnt-routes (use steps 5-7 as guides).

After you prepare the inetnum, you are ready to upload the subnet to the IPXO Marketplace.
Learn more
Contact Customer Solutions
If you have any questions, contact our Customer Solutions Team