How To Prepare Your Subnet for the IPXO Marketplace
Learn how to prepare your subnet to ensure that it is successfully verified in the IPXO Marketplace.
IPXO’s goal is to make the leasing of IP addresses as fast and easy as possible. We aim to make this an enjoyable experience for our clients, and this is why we employ automation to supervise and prepare subnet ranges.
If you want your subnets verified in the IPXO Marketplace, you have to prepare subnet ranges for it. Continue reading this article to learn how to prepare your subnet for the IPXO Marketplace.
Note: Some changes described below require the subnet to be placed in the Marketplace for validation. Therefore, it is best to start the process by registering at the IPXO Portal, adding the IPs to the Marketplace and then making the changes described below.
Step 1: Check supported inetnum statuses
Before you place your subnet to the IPXO Marketplace, check if your subnet has the right status.
AFRINIC inetnum status
This table shows which statuses are acceptable if you want to add subnets to the IPXO Marketplace from AFRINIC.
| Inetnum Status | Action |
| Sub-Allocated PA | Authorize by adding IPXO-MNT as mnt-by |
| Allocated PA (mask = 24) | Unsupported |
| Allocated PA (mask < 24) | Create a more specific inetnum with Assigned PA status and add IPXO-MNT as mnt-by |
| Assigned PA | Authorize by adding IPXO-MNT as mnt-by |
| Legacy | Unsupported |
APNIC inetnum status
This table shows which statuses are acceptable if you want to add subnets to the IPXO Marketplace from APNIC.
| Inetnum Status | Action |
| Allocated Portable (mask = 24) | Unsupported |
| Allocated Portable (mask < 24) | Create a more specific inetnum with Allocated Non-Portable status; authorize by adding IPXO generated mnt-by |
| Allocated Non-Portable | Authorize by adding IPXO generated mnt-by |
| Assigned Portable | Unsupported |
| Assigned Non-Portable | Unsupported |
| Legacy | Unsupported |
ARIN nettype status
This table shows which statuses are acceptable if you want to add subnets to the IPXO Marketplace from ARIN.
| NetType | Action |
| Direct Allocation | Reallocate to IPXO LLC (OrgID: IL-845) |
| Direct Assignment | Unsupported: To change your Direct Assignment to Direct Allocation, open a ticket and request the change of the status |
| Reassigned | Unsupported |
| Reallocated | Supported if reallocated to IPXO LLC (OrgID: IL-845) |
| Legacy | Unsupported |
LACNIC inetnum status
This table shows which statuses are acceptable if you want to add subnets to the IPXO Marketplace from LACNIC.
| Inetnum Status | Action |
| Direct Allocation | Reallocate to IPXO Ltd. OrgID: BZ-IPLT2-LACNIC |
| Direct Allocation (=/24) | Unsupported |
| Allocated | Reallocate to IPXO Ltd. OrgID: BZ-IPLT2-LACNIC |
| Allocated (=/24) | Unsupported |
| Legacy Reallocated (=/24) Reallocated | Unsupported: Reallocate to IPXO Ltd. OrgID: BZ-IPLT2-LACNIC |
RIPE inetnum status
This table shows which statuses are acceptable if you want to add subnets to the IPXO Marketplace from RIPE.
| Inetnum Status | Action |
| Sub-Allocated PA | Authorize by adding IPXO-MNT as mnt-by |
| Legacy | Unsupported |
| Allocated PA (mask = 24) | Authorize via ROA and by adding IPXO-MNT as mnt-lower, mnt-domains, mnt-routes |
| Assigned PA | Unsupported: Recreate the inetnum with a Sub-Allocated PA status |
| Allocated PA (mask < 24) | Create a more specific inetnum with Sub-Allocated PA status and add IPXO-MNT as mnt-by |
| Assigned PI | Unsupported: Here is an official guide from RIPE on how to convert an Assigned PI to an Allocated PA |
Step 2: Set ORG abuse contact for the ownership verification
The subnet you add to the Marketplace must have the organization’s object abuse contact set if you want to receive the ownership confirmation email. The confirmation of the subnet is proof that you own the IP addresses and that you have been assigned the subnet.
To set up the ORG abuse contact (abuse-c) on the inetnum, follow the instructions in these articles:
Step 3: Set the abuse contact
Before you upload a subnet to the IPXO Marketplace, make sure you have added our abuse contact in RIPE (IPXO834).
To set up the abuse contact (abuse-c) in WHOIS as [email protected], follow the instructions in these articles:
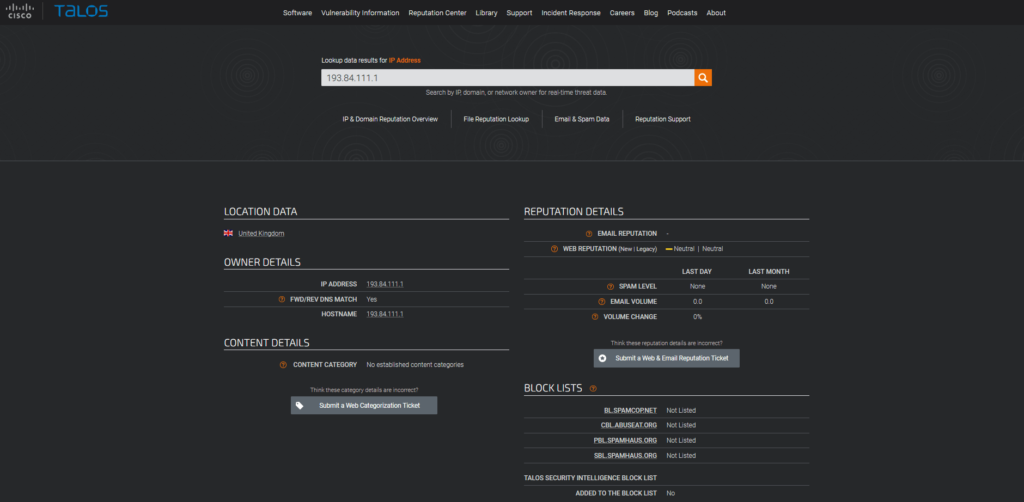
Step 4: Check if the subnet is not blocklisted
Make sure that your subnet is not listed in any abuse blocklists. The IPXO Marketplace will only accept clean IP ranges. If your subnet is blocklisted, remove it from the list before adding it to the Marketplace.
Here are a few examples of tools that you can use to inspect your IP ranges:
Here’s an example of 193.84.111.1 inspected using the Talos Intelligence Lookup tool. This subnet is clean.
Step 5: Add IPXO as the resource maintainer
To enable automation, you need to edit the WHOIS information of the subnets you have placed in the IPXO Marketplace.
In RIPE and AFRINIC, add our maintainer (IPXO-MNT) as the mnt-by attribute to enable us to automate IP resource management. If the subnet is =/24 and has the Allocated PA status, add us as mnt-lower, mnt-route, mnt-domains.
You can find more information about this using the following guides:
In ARIN, you need to reallocate networks (subnets) to the organization OrgID: IL-845.
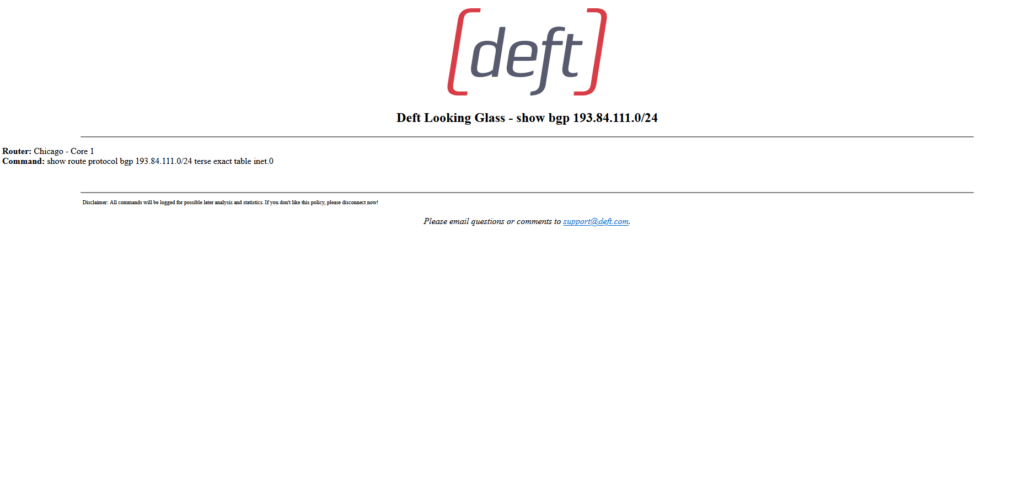
Step 6: Check subnet announcement
The last step before you prepare subnet ranges for the IPXO Marketplace is to make sure that the subnet is not announced.
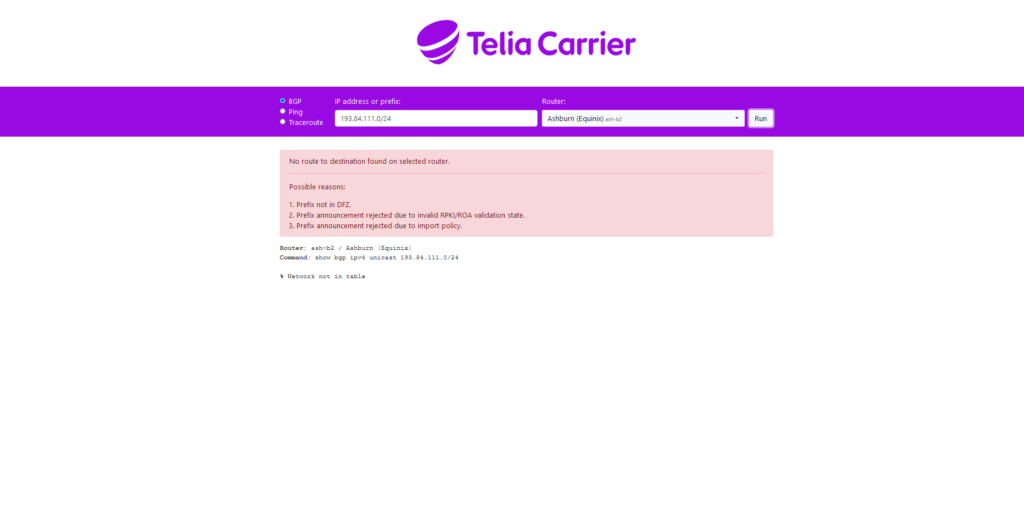
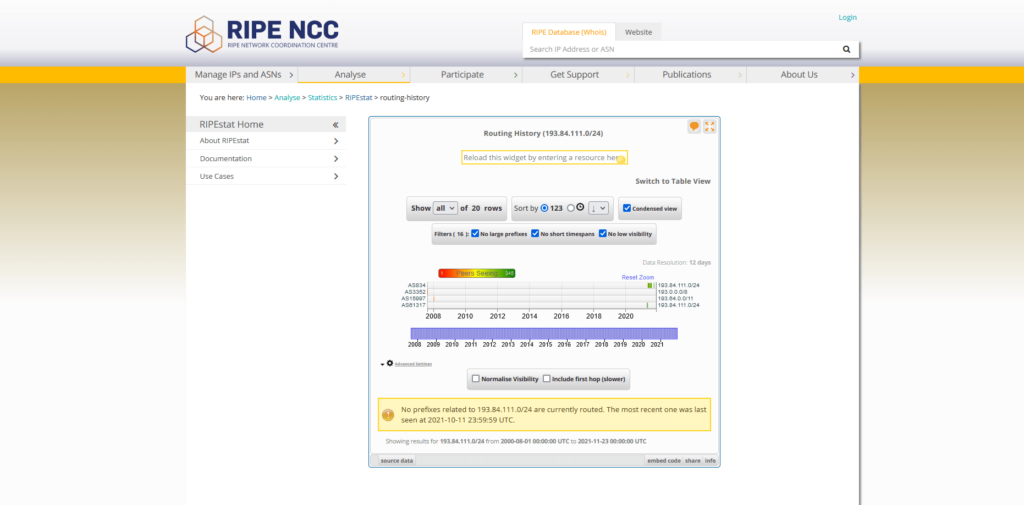
You can check if your subnet is announced using these three tools:
- Deft Looking Glass shows the announcement live.
- Telia Looking Glass shows the announcement live.
- RIPE Routing History tool renews information every 12 hours.
If you have any questions, please contact our Customer Support team via help.ipxo.com.
Learn more
Contact Customer Solutions
If you have any questions, contact our Customer Solutions Team