Preparing the Subnet Before Placing It in the IPXO Marketplace (LACNIC)
Learn how to prepare your subnet before adding it to the IPXO Marketplace.
If you wish to add your LACNIC allocated subnet to the IPXO Marketplace, you need to prepare it accordingly. Follow these instructions to learn how to prepare the subnet before placing it in the Marketplace.
Step 1: Check your subnet’s status
Log in to your MiLACNIC account.
You need to check your subnet’s WHOIS information to find the details about your subnet status. Use the Adding Subnets to IPXO From LACNIC guide to find the list of statuses accepted in the IPXO Marketplace.
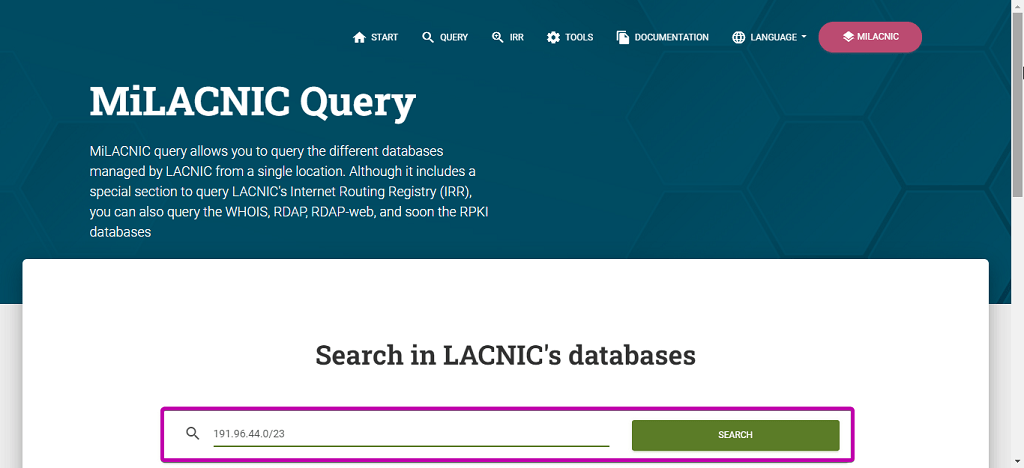
To find the details about the inetnum, use the MiLACNIC Query service. Enter the subnet into the search field and click SEARCH.
To demonstrate, we use the subnet 191.96.44.0/23.
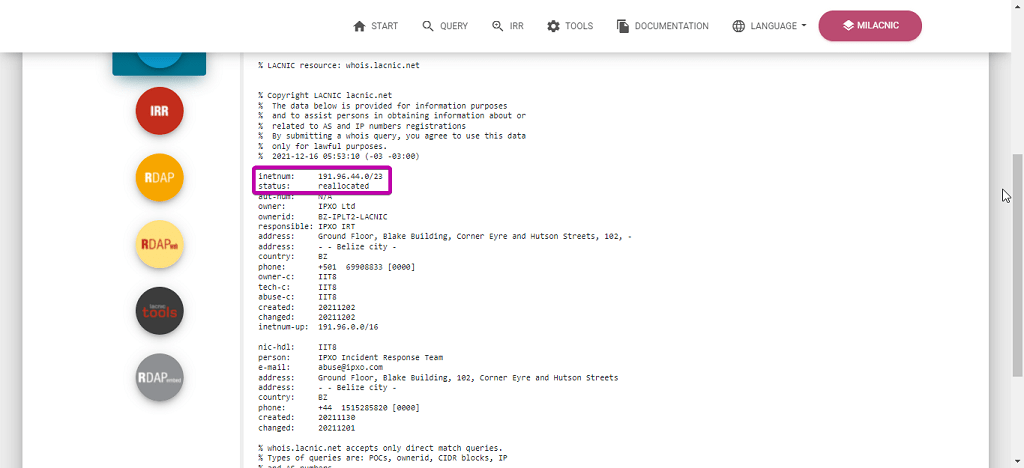
The image below shows how the result should look like. The highlighted object attributes are necessary for placing the subnet in the IPXO Marketplace.
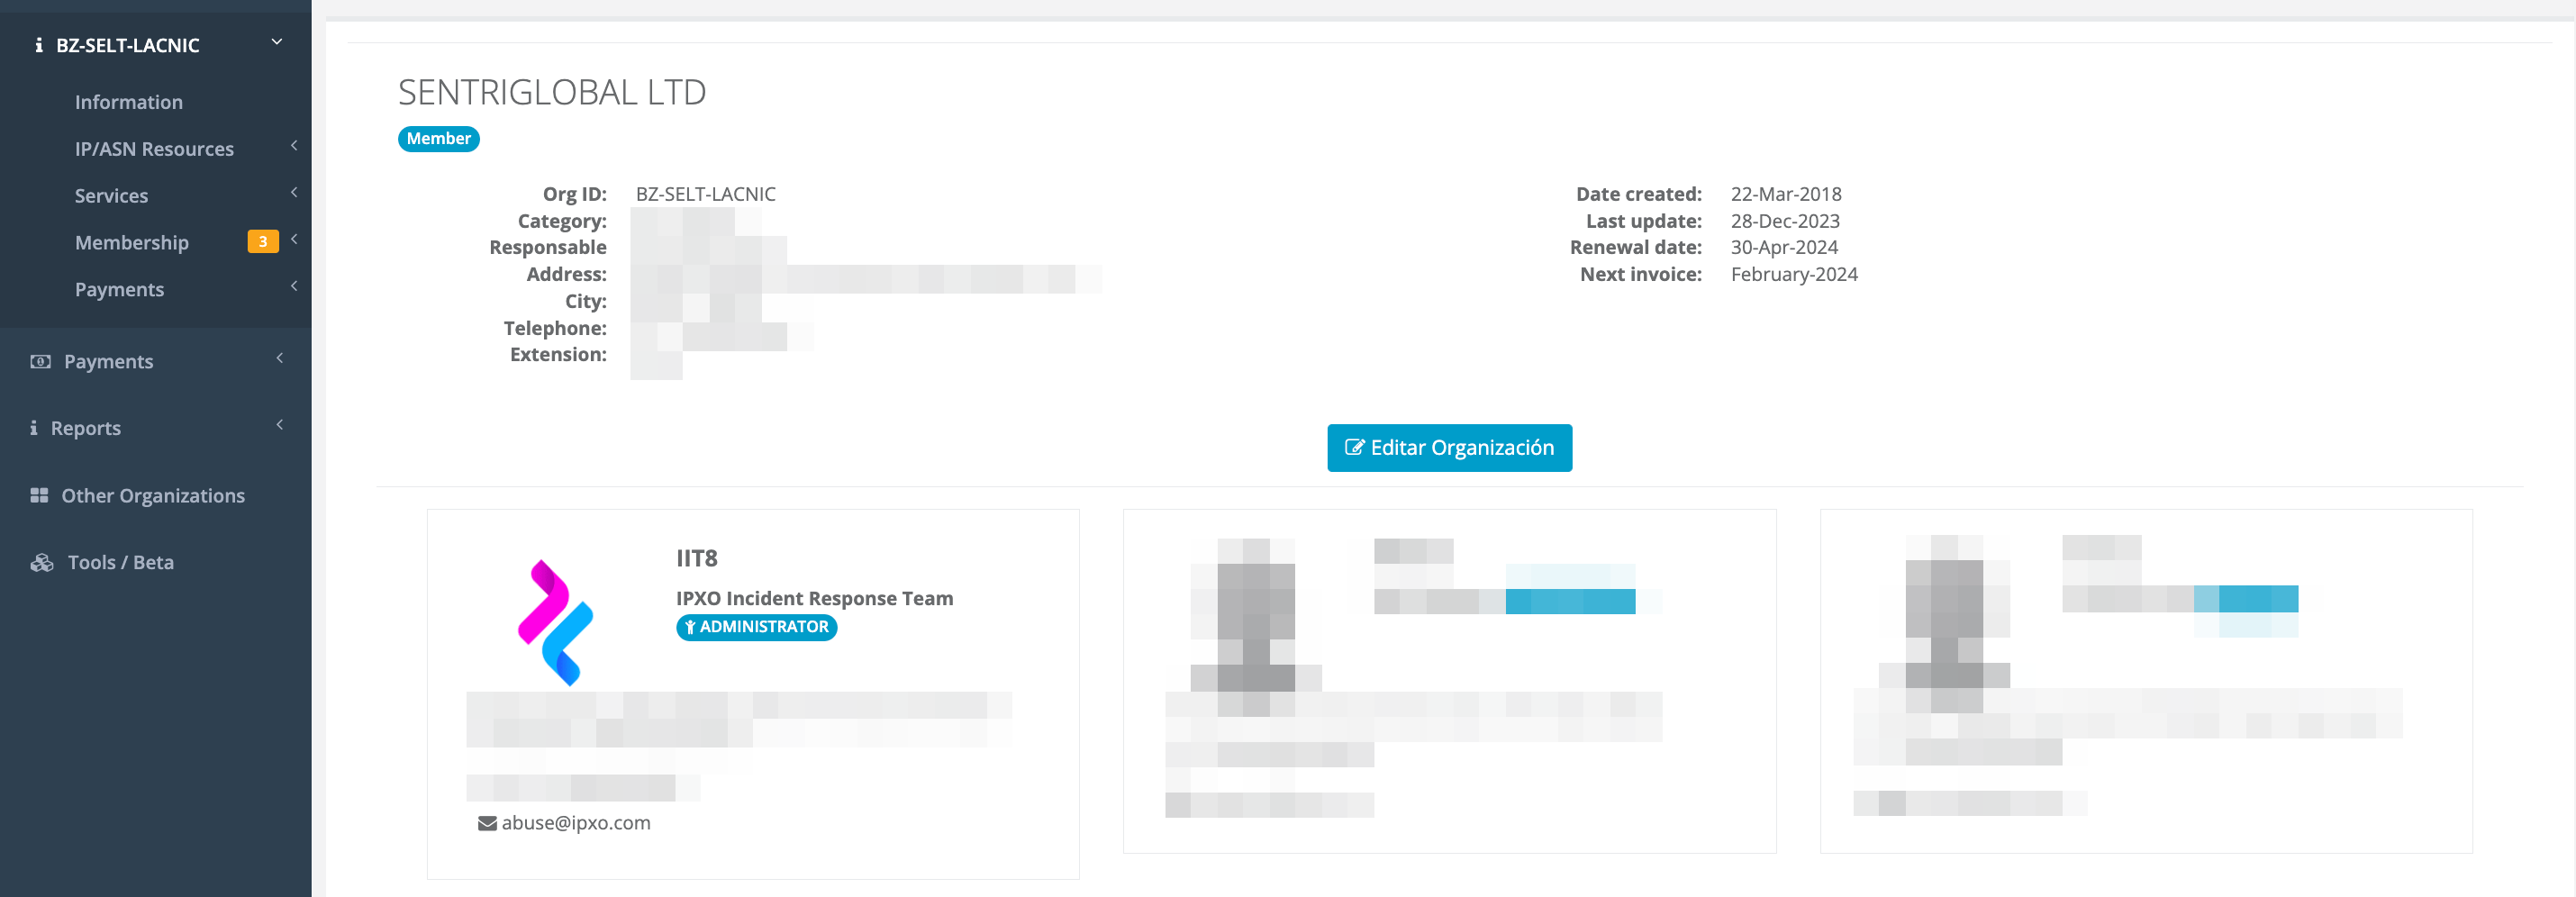
Step 2: Set the organization’s owner-c email
To set the organization’s owner-c (owner contact) is mandatory, as this is where you will receive a subnet ownership confirmation email to verify the subnet.
You can read the How To Set Your Organization’s Contact in LACNIC guide to set the contact right.
Step 3: Reallocate your network resource to IPXO
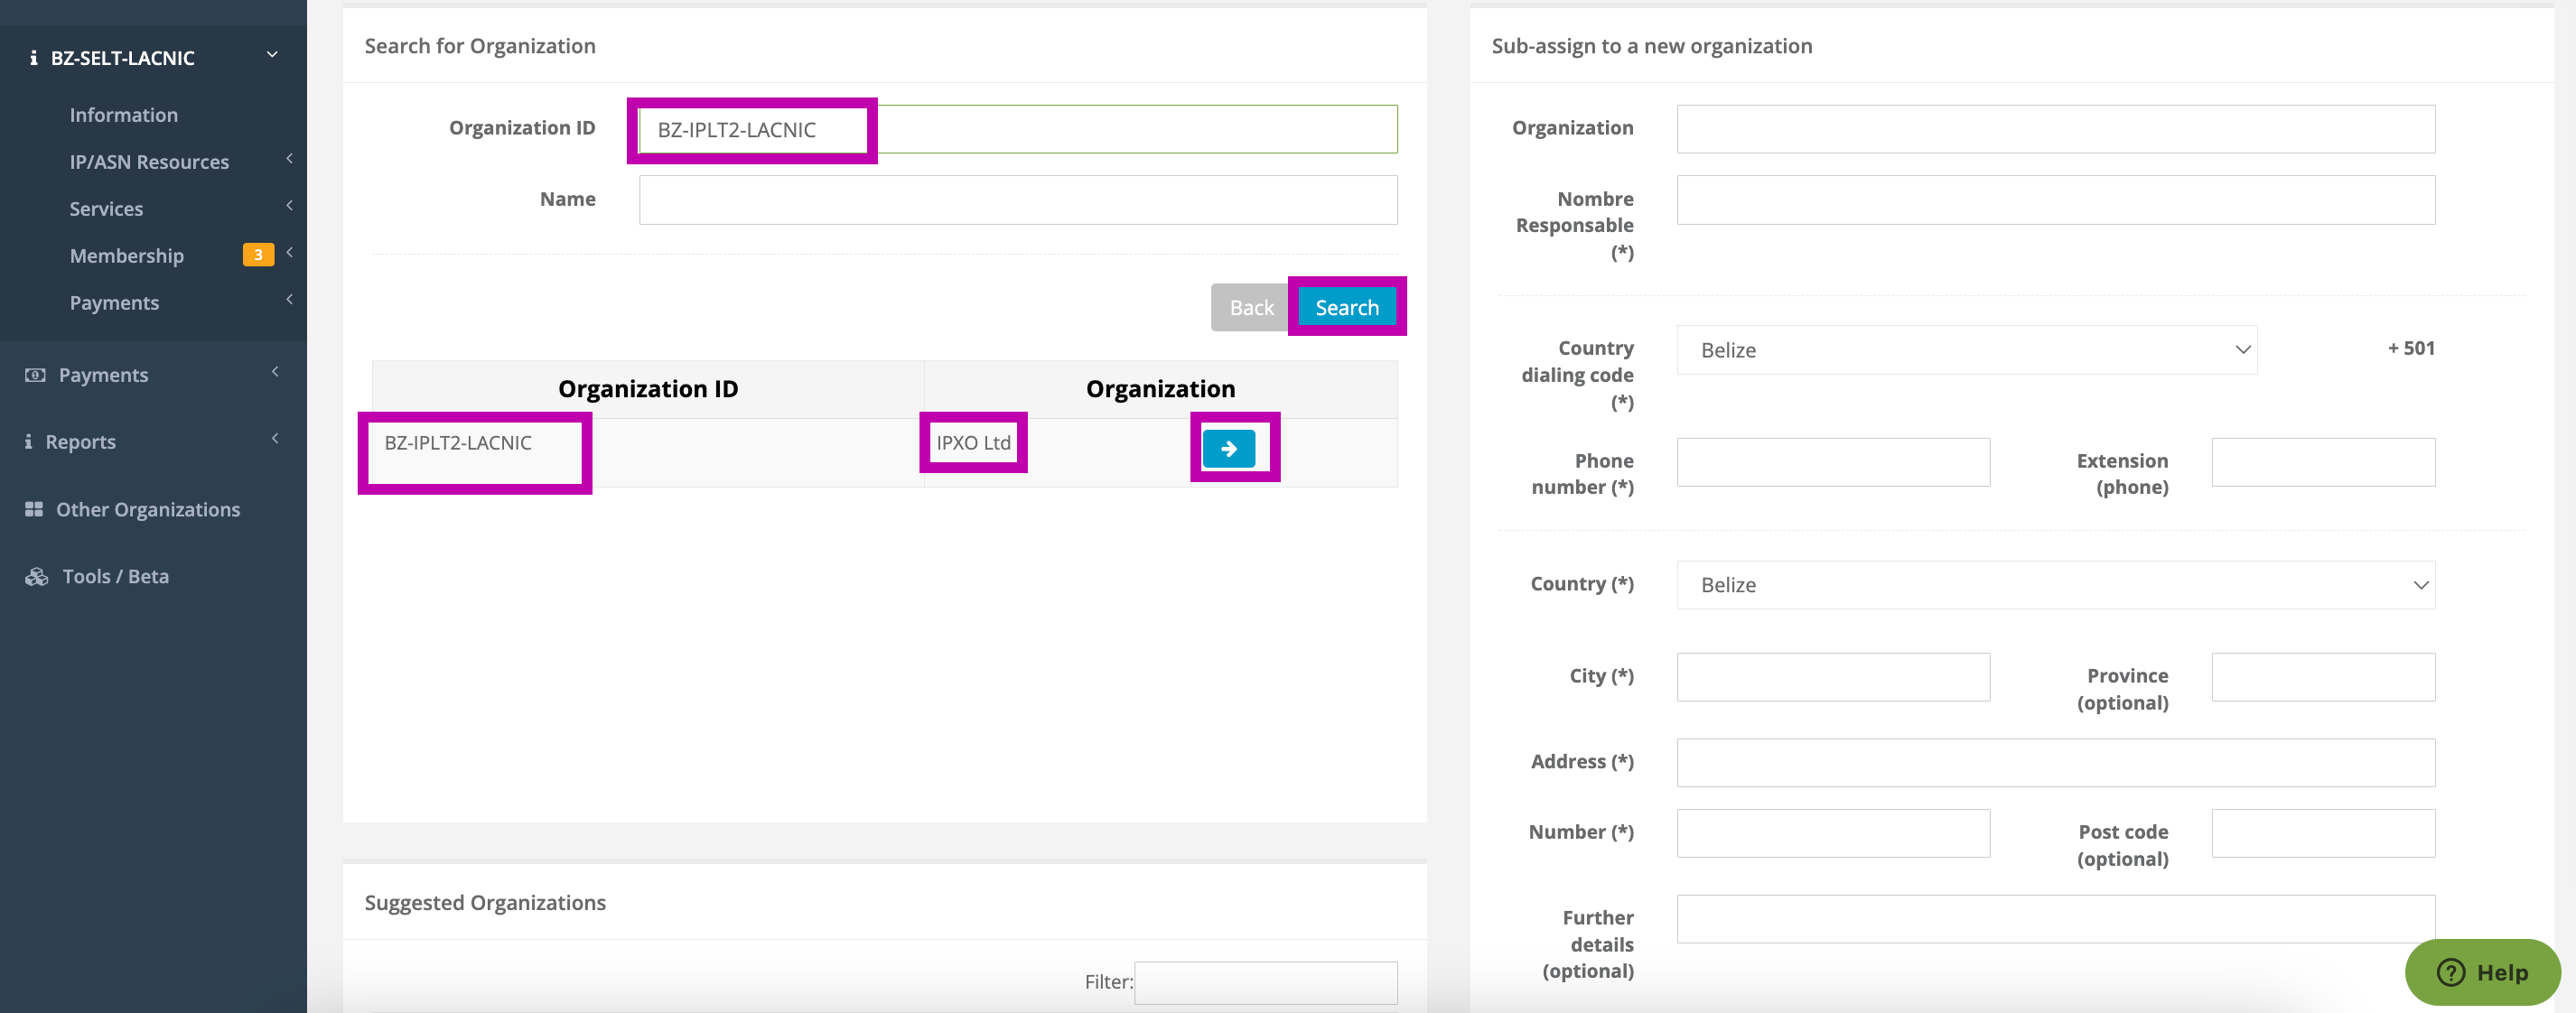
In your account’s dashboard on the left, click IP/ASN Resources -> Manage.
Select the subnet you want to reallocate under IP by LACNIC and then click the Sub-Assign button.
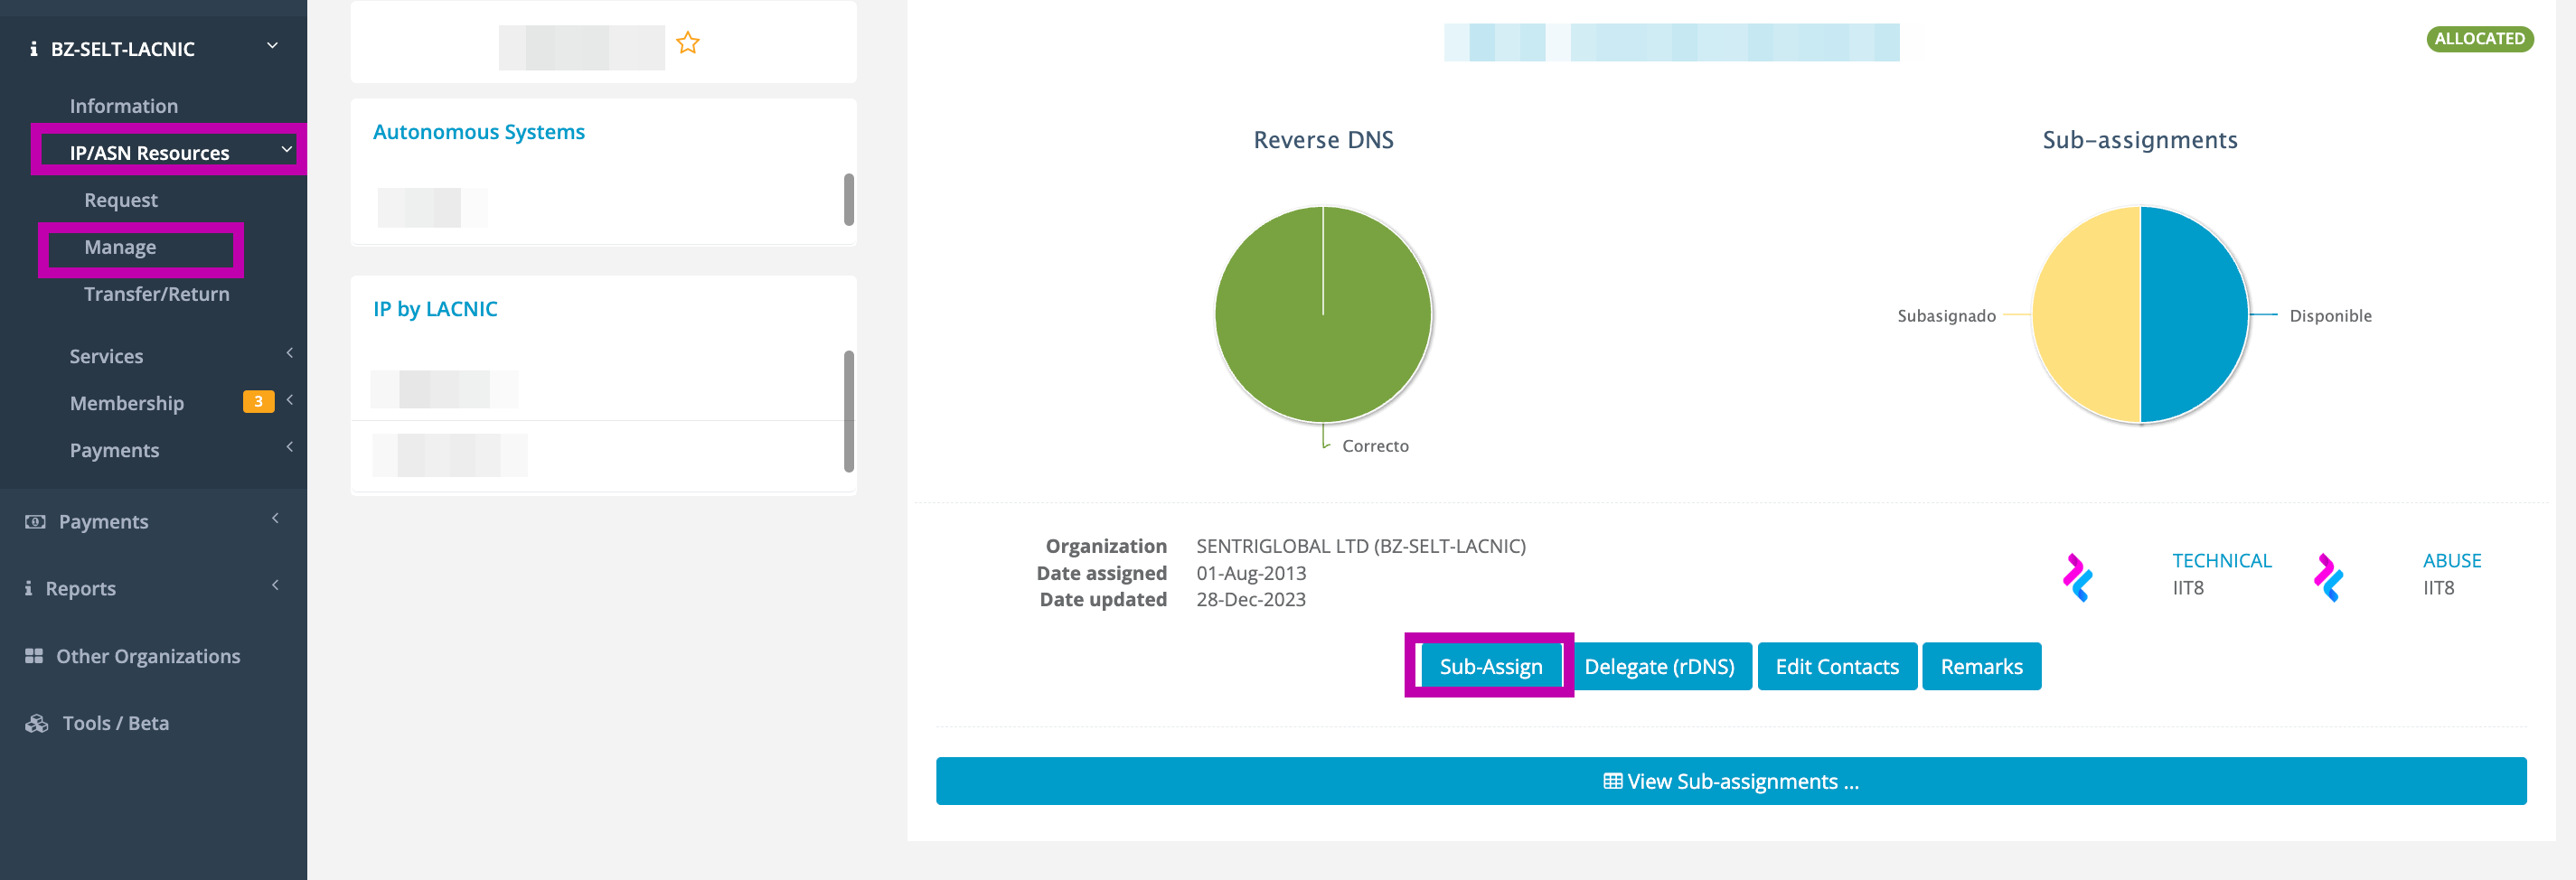
Enter BZ-IPLT2-LACNIC into the Organization ID field and click Search. Once you find the organization, click the blue arrow icon on the right.
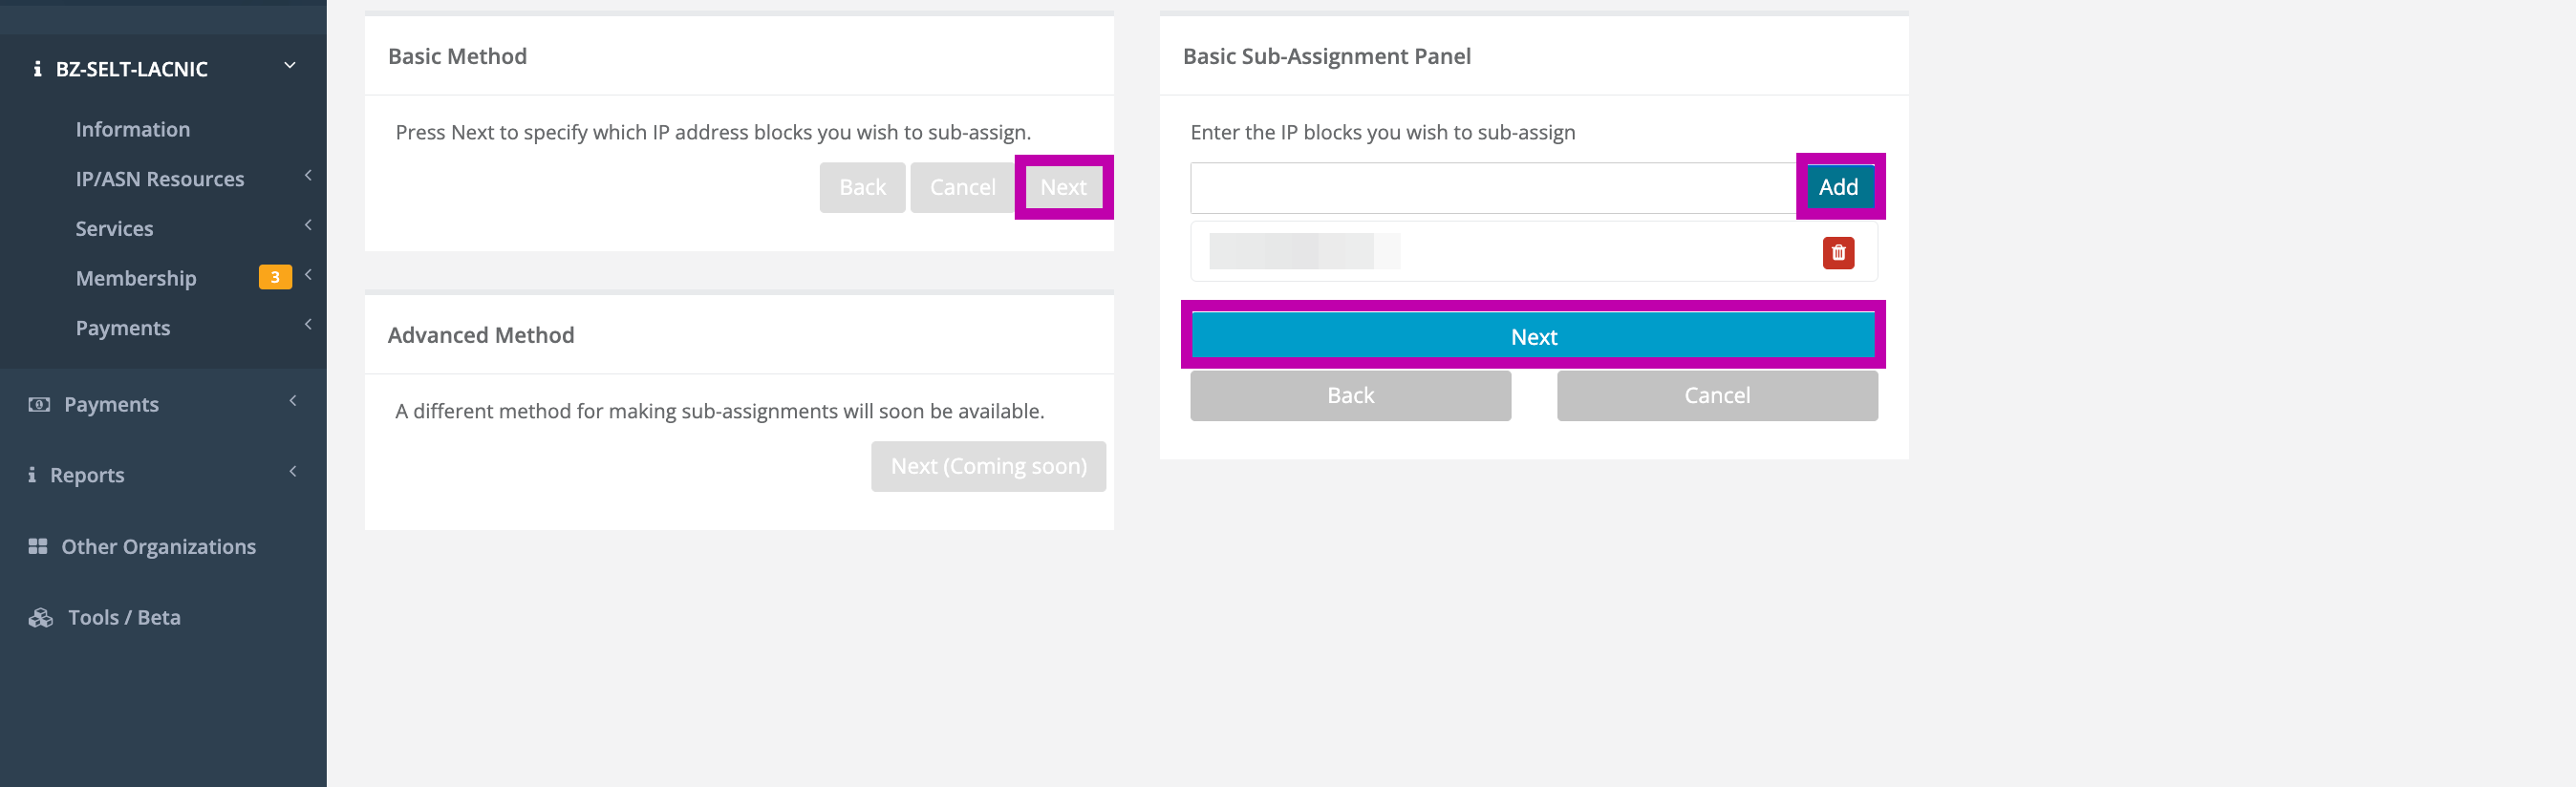
Click Next under Basic Method, enter the range you want to reallocate to IPXO in the Basic Sub-Assignment Panel and click Add. Once you select one or more ranges, click Next.
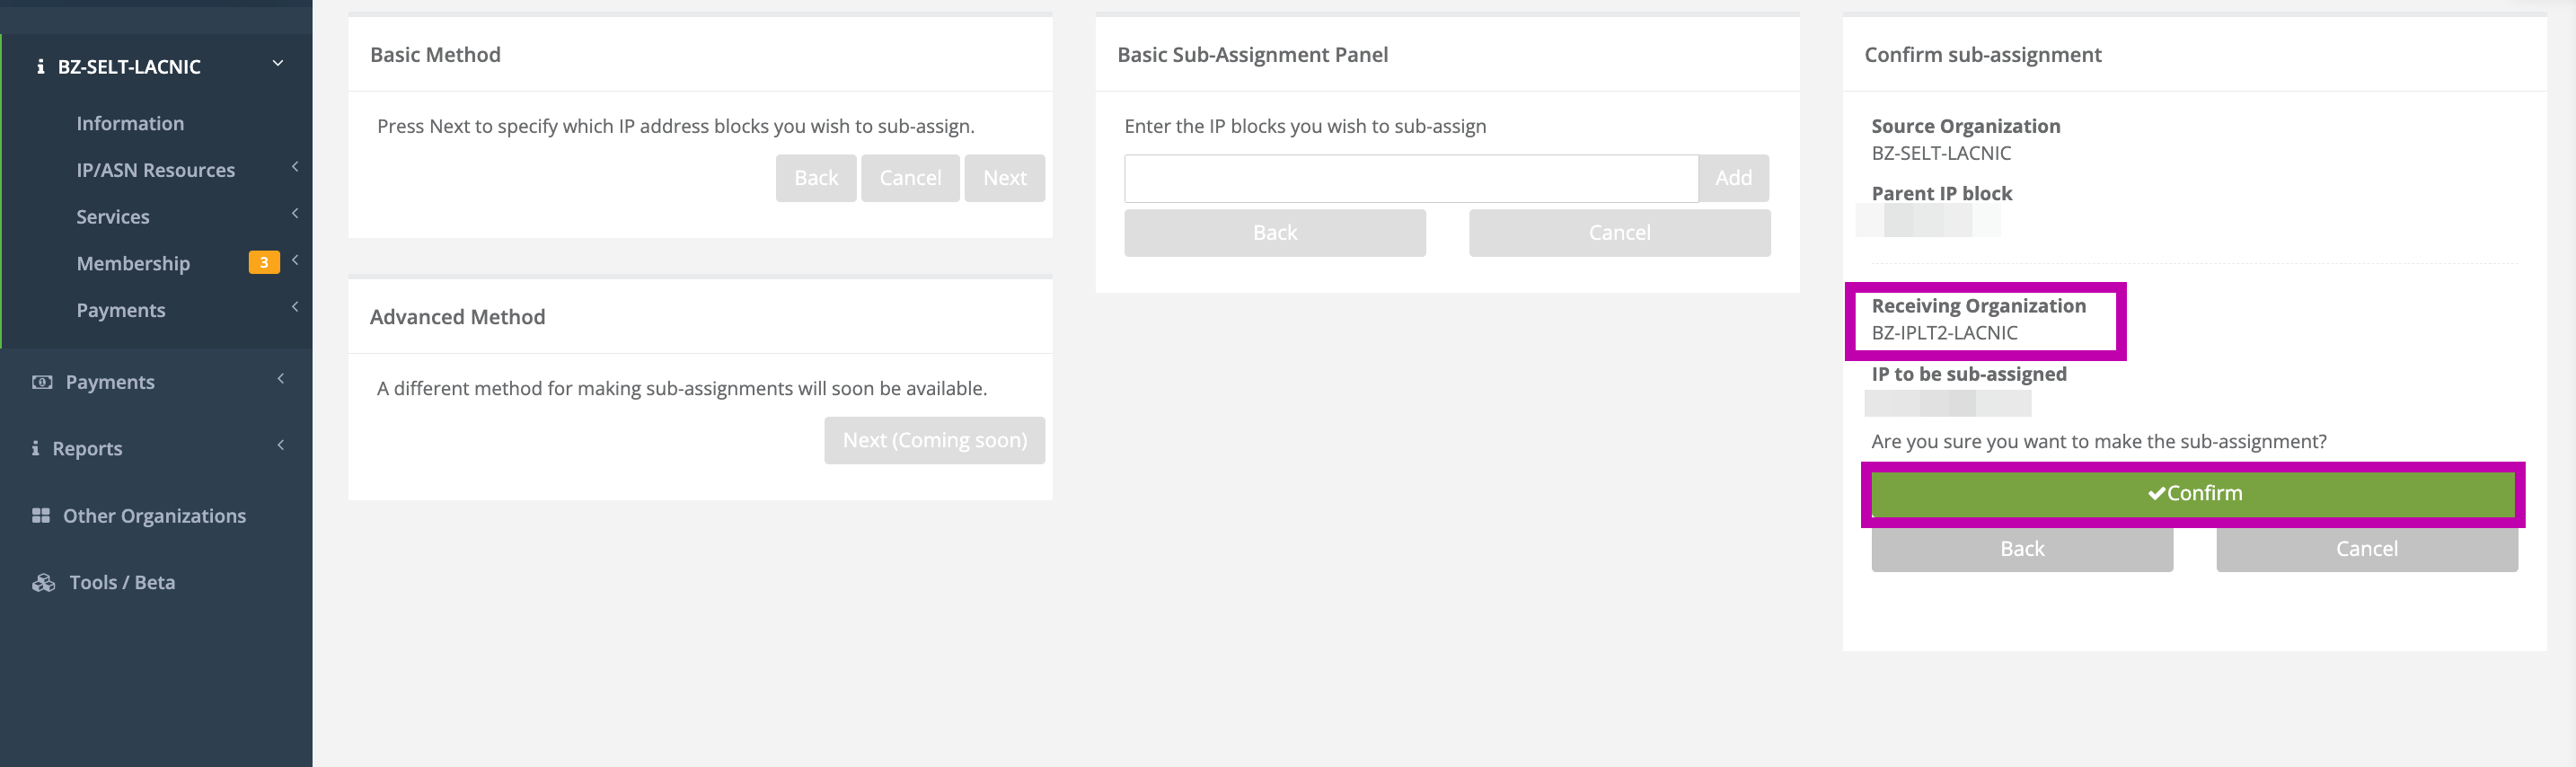
Double-check if you have selected the range you want to reallocate and if the Receiving Organization (BZ-IPLT2-LACNIC) is correct. If everything looks good, click Confirm to complete reallocation to IPXO.
Once the range is reallocated to IPXO, you can add it to the IPXO Marketplace for monetization.
Learn more
Contact Customer Solutions
If you have any questions, contact our Customer Solutions Team