Subnet Ownership Confirmation
Learn how to validate your subnet ownership.
Subnet ownership confirmation is proof that you are the legitimate owner of the IP addresses and that the subnet has been issued to you. The confirmation of the subnet is mandatory.
Follow the guides below to learn how to validate subnet ownership for subnets from every Regional Internet Registry:
How to receive the ownership confirmation email for AFRINIC subnets
To receive a subnet confirmation ownership email for AFRINIC subnets, you must set the abuse-mailbox contact for either admin-c or tech-c role (as maintainer, mnt-by). Before you add the abuse-mailbox contact to your maintainer, check if your subnet status is acceptable at IPXO.
What are acceptable ARFRINIC subnets?
Use the Adding Subnets to IPXO From AFRINIC guide to learn which subnet statuses are accepted in the IPXO Platform. The information can help you avoid problems when moving your subnet to the IPXO Platform in the future.
How to find your maintainer admin-c or tech-c in AFRINIC
The subnet ownership confirmation email for AFRINIC subnets is sent to your admin-c or tech-c abuse-mailbox contact when the subnet is added to the IPXO Platform.
To demonstrate, we search IPXO-MNT (our maintainer) using AFRINIC’s Whois Search query tool.

In this example, the admin-c attribute has the abuse-mailbox contact associated with it.
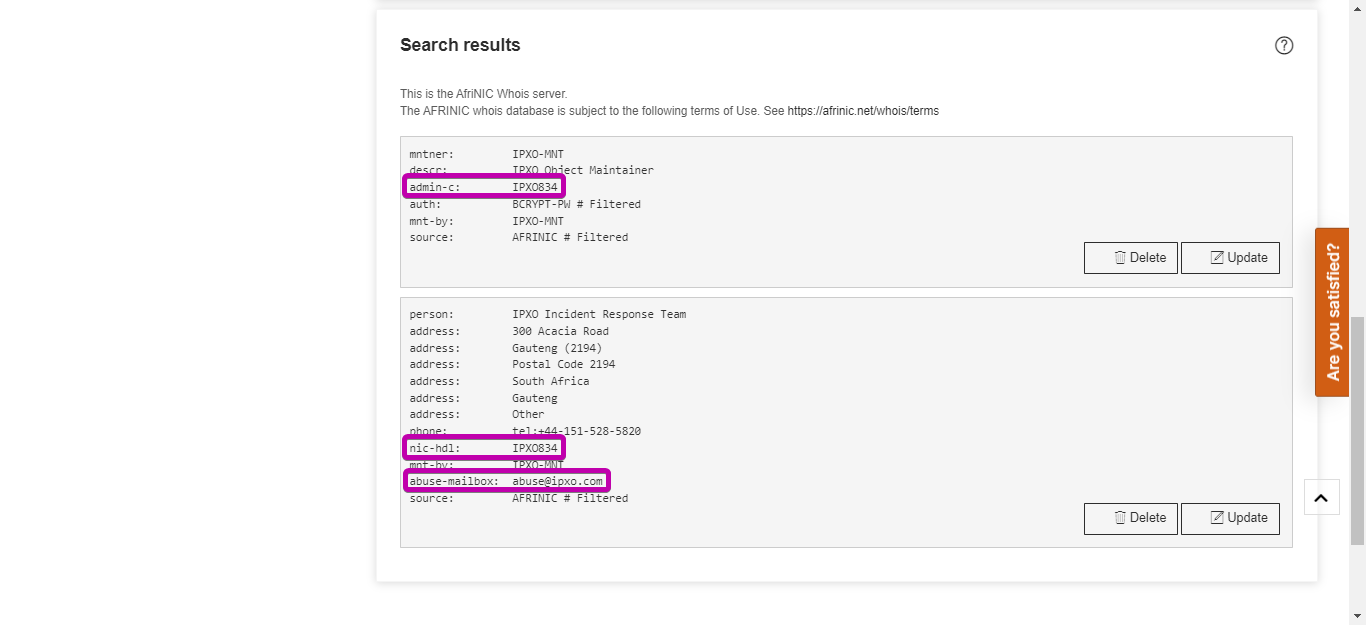
Note: You must set abuse-mailbox to at least one of the maintainers (admin-c or tech-c).
How to add/update the abuse-mailbox for your admin-c or tech-c in AFRINIC
Use this easy-to-follow guide to learn How to Add/Update the abuse-mailbox for Your admin-c or tech-c attributes in AFRINIC.
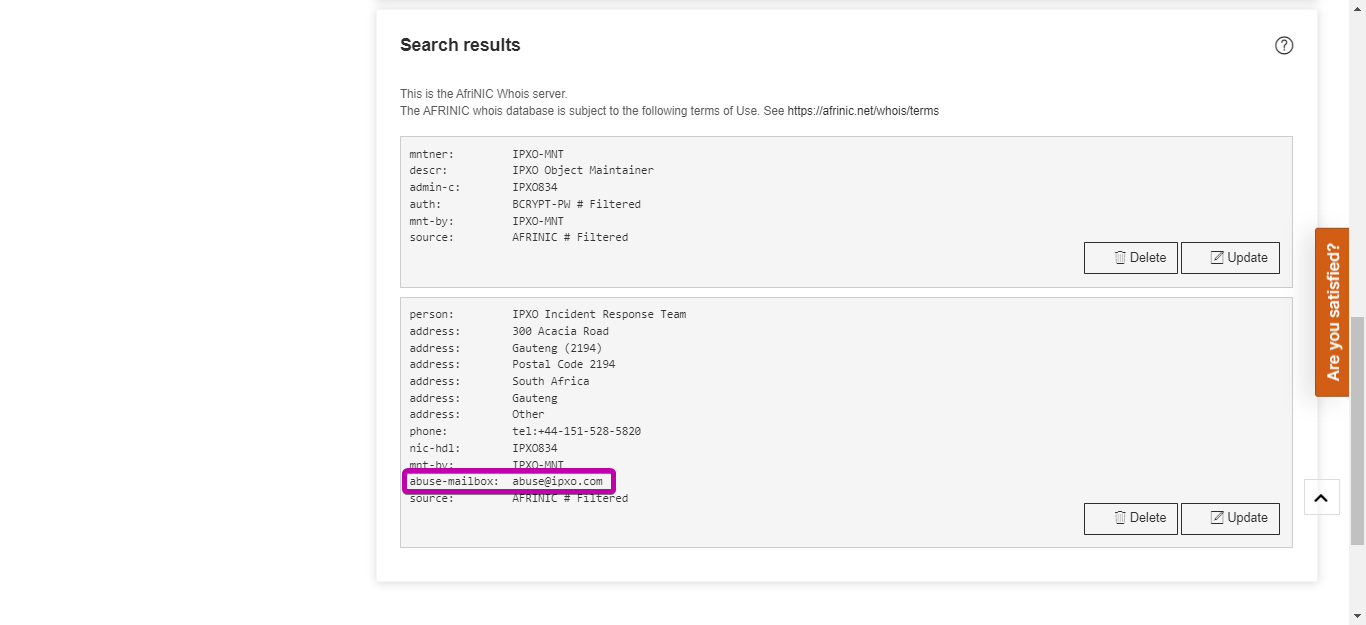
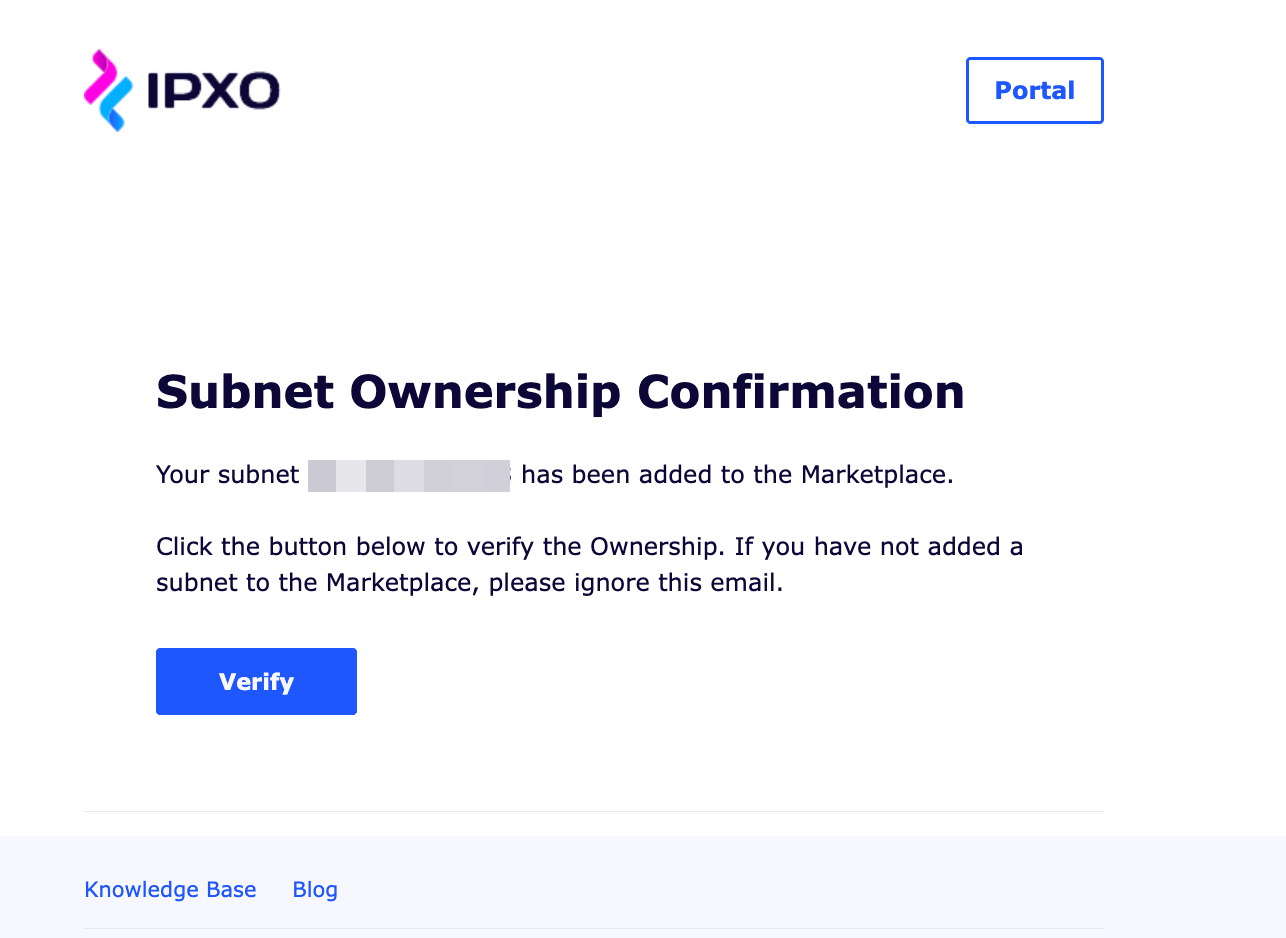
Once you add the abuse-mailbox attribute, you will be able to receive the subnet ownership confirmation email. The image below shows an example of the subnet ownership confirmation email.

How to receive the ownership confirmation email for APNIC subnets
To receive a subnet ownership confirmation email for APNIC subnets, you must add the organization’s attribute (ORG) to the subnet’s inetnum.
Note: The subnet ownership confirmation email for APNIC subnets is sent to your org (organization attribute) email contact.
What are acceptable APNIC subnets?
Before you add the ORG, check if your subnet status is acceptable at IPXO. This guide informs which inetnum statuses are accepted in the IPXO Platform.
How to find your organization’s attribute ID
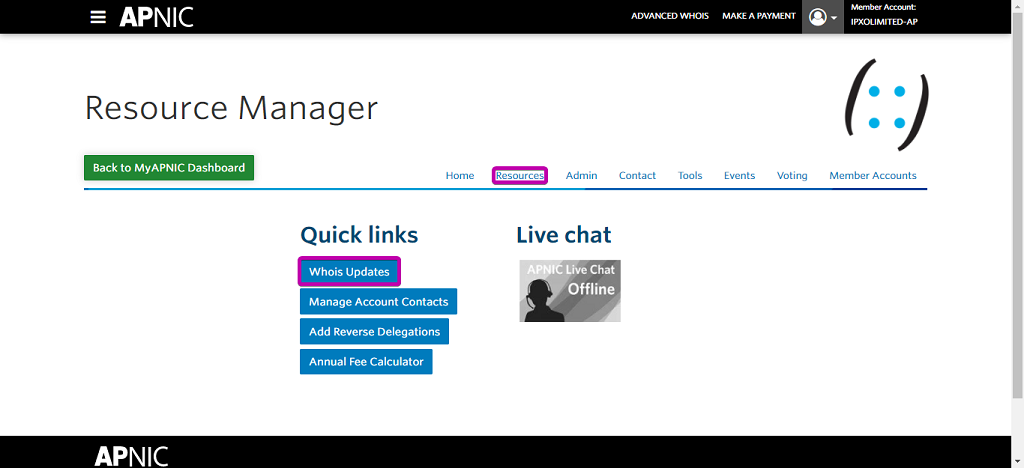
Step 1: Access APNIC’s Resource Manager menu
Log in to your MyAPNIC account and click Go to Resource Manager.

Step 2: Access APNIC’s Whois Updates menu
Click Whois Updates in the Quick Links menu or go to Resources -> Whois Updates.
Step 3: Find the Object
Click the View tab, expand the Object type drop-down menu and select organisation.
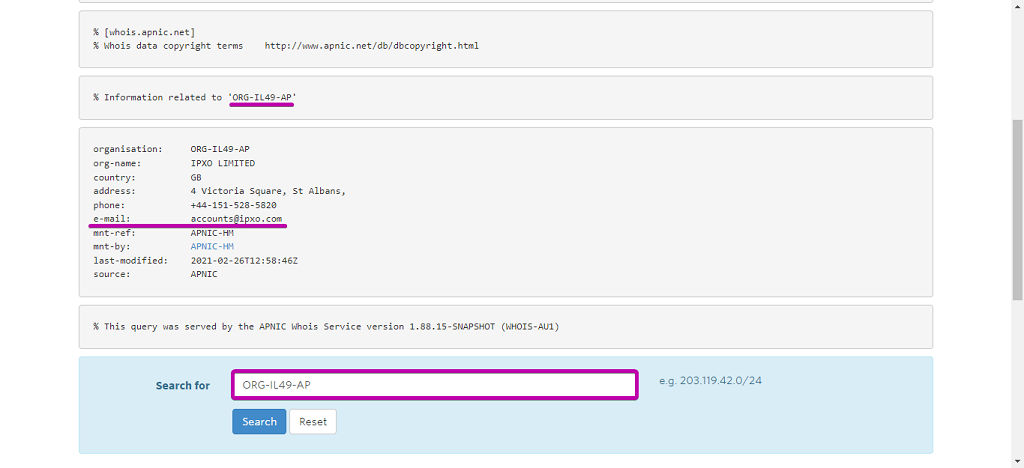
To demonstrate, we use ORG-IL49-AP.
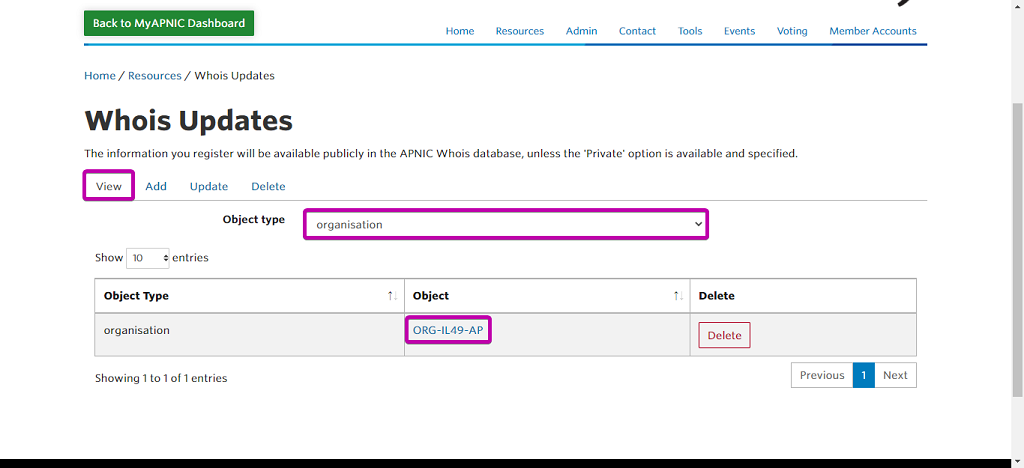
To check how the Organization is represented via Whois and where the ownership email will be sent, click the Object name or type it into the APNIC Whois Search engine.
In our example, the ownership email will be sent to [email protected].
If everything’s set up correctly, you will receive your subnet ownership confirmation email successfully. The image below shows an example of the subnet ownership confirmation email.

How to receive the subnet ownership confirmation email for ARIN subnets
To receive a subnet confirmation ownership email for ARIN subnets, you must add the organization’s abuse POC to the subnet’s inetnum. Before you add the POC, make sure that your subnet status is acceptable at IPXO.
What are acceptable ARIN subnets
Use this helpful guide to learn how to add subnets allocated by ARIN to IPXO. This guide informs which subnet nettypes are accepted in the IPXO Platform. It can also help you avoid problems when moving your subnet to the IPXO Platform in the future.
How to add the POC to ARIN subnet inetnum
Use this easy-to-follow guide to learn how to add your organization’s point of contact (POC) in ARIN. Once you add the POC, you will be able to receive the subnet ownership confirmation email.
Note: You must add an abuse POC for your organization to validate the ownership of your resources.
How to find the abuse POC (point of contact) in ARIN
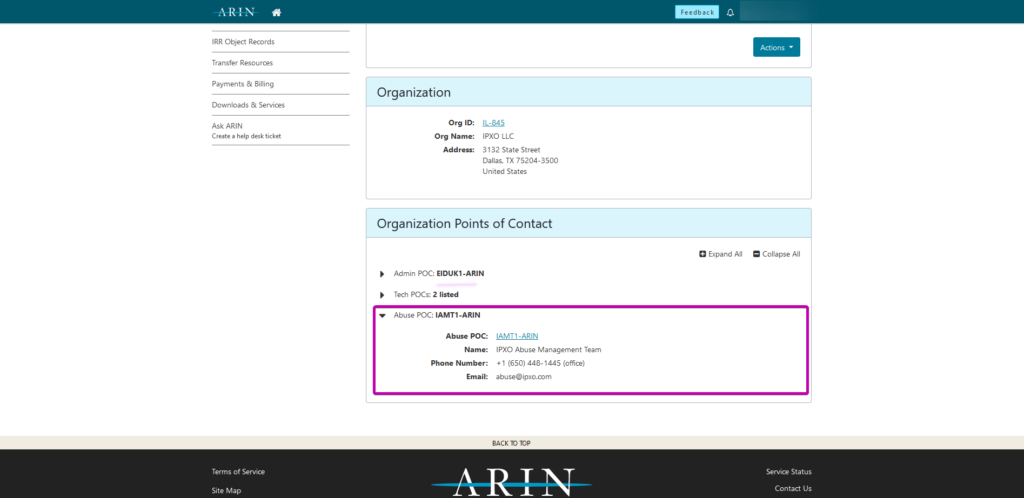
The subnet ownership confirmation email for ARIN subnets is sent to your org (organization object) abuse contact.
To demonstrate, we use the subnet 45.56.199.0/24.
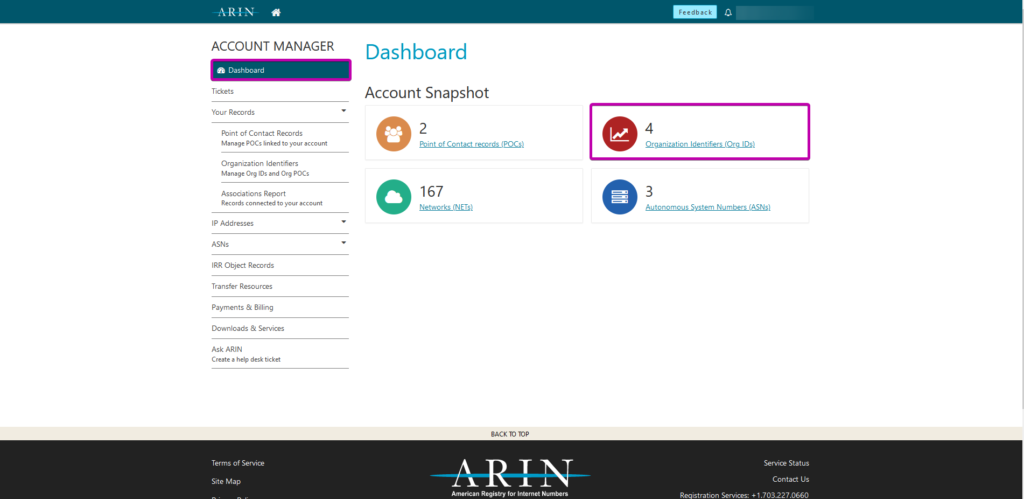
Step 1: Access the Organization Identifiers (Org IDs) menu
Log in to your ARIN Account Manager and click Dashboard on the left. In the Account Snapshot menu, click Organization Identifiers (Org IDs).
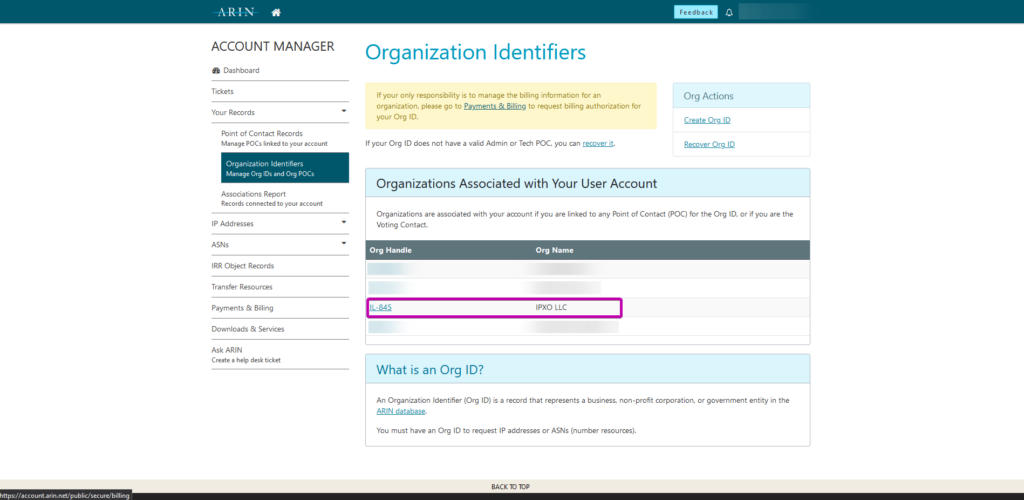
Step 2: Select Org Handle
In the Organization Identifiers menu, move to the Org Handle list and select the desired handle (e.g., IL-845).
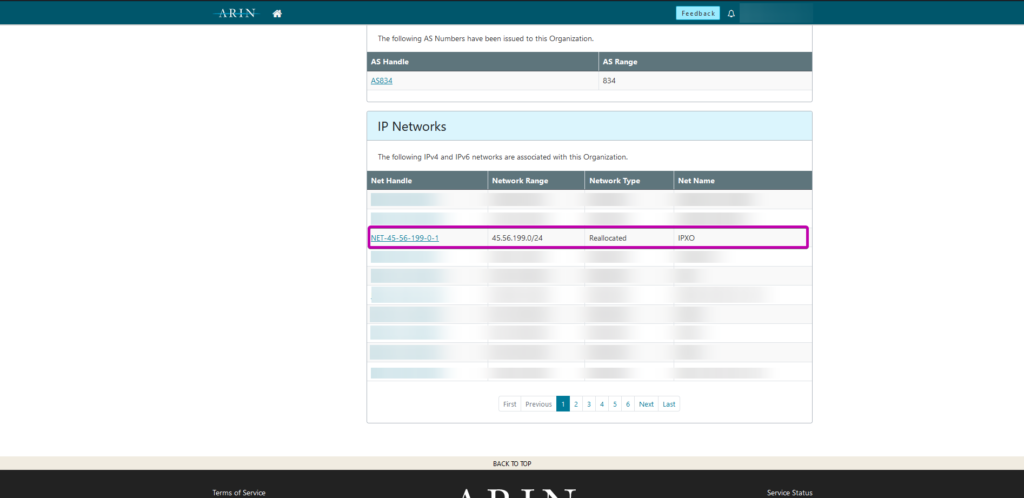
Step 3: Select Net Handle
In the IP Networks menu, move to the Net Handle list and select the desired handle (e.g., NET-45-56-199-0-1).
Step 4: Find the POC
In the Organizations Points of Contact menu, scroll down to the Abuse POC section. Click the arrow on the left to expand the information. You can find your POC email in the Email section.
The image below shows an example of the subnet ownership confirmation email.

How to receive the ownership confirmation email for LACNIC subnets
To receive the subnet ownership email from LACNIC, you must set your organization’s Administrator user email, and your subnet’s status must be acceptable at the IPXO Platform.
What are acceptable LACNIC subnets?
Use the Adding Subnets to IPXO From LACNIC guide to learn which subnet statuses are accepted in the IPXO Platform.
How to find the current organization’s Administrator user/email
Go to MiLacnic, log in, open your organization’s profile and check the information.
In our example, the organization’s (CL-DETC-LACNIC) Administrator user is VIG28 with the email address [email protected].
Note: You can find more information in the How To Set Your Organization’s Contact in LACNIC guide.

How to receive the ownership email
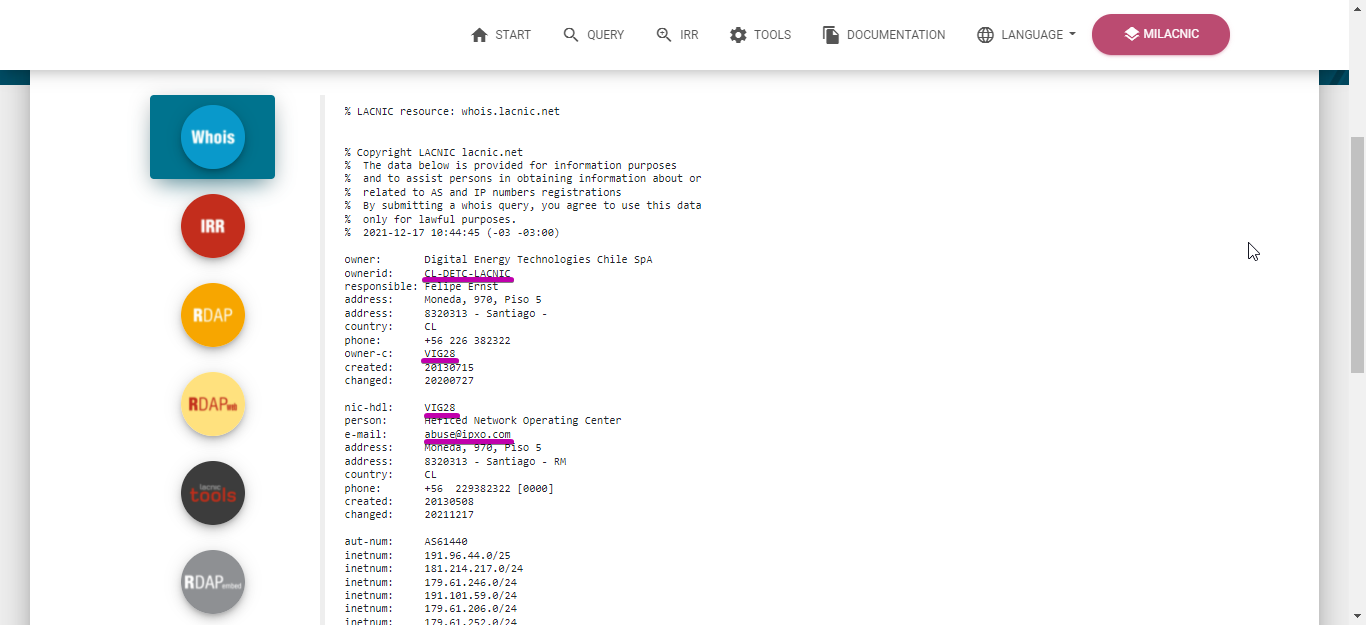
The LACNIC ownership email is sent to your ORG (organization object) owner-c contact. You can use LACNIC’s Whois Search service to find this information.
In our example, the organization’s (CL-DETC-LACNIC) owner-c is VIG28 with the email address [email protected].
Once you add the owner-c contact, you will be able to receive the subnet ownership confirmation email. The image below shows an example of the subnet ownership confirmation email.
How to receive the subnet ownership confirmation email for RIPE subnets
To get the subnet ownership email from RIPE, you need to add an Organization Object (org) to the subnet inetnum. Before you start following steps to add an org attribute, make sure that your subnet status is acceptable at IPXO.
What are acceptable RIPE subnets?
Use this helpful guide to learn how to add subnets allocated by RIPE to IPXO. This guide informs which RIPE subnet statuses are accepted in the IPXO Platform. This information can help you avoid problems when moving your subnet to the IPXO Platform in the future.
How to add the org attribute to RIPE subnet inetnum
Use this easy-to-follow guide to learn how to add org in RIPE. Once you create the org attribute, you will be able to receive the subnet ownership confirmation email.
How to find the abuse POC (point of contact) in RIPE
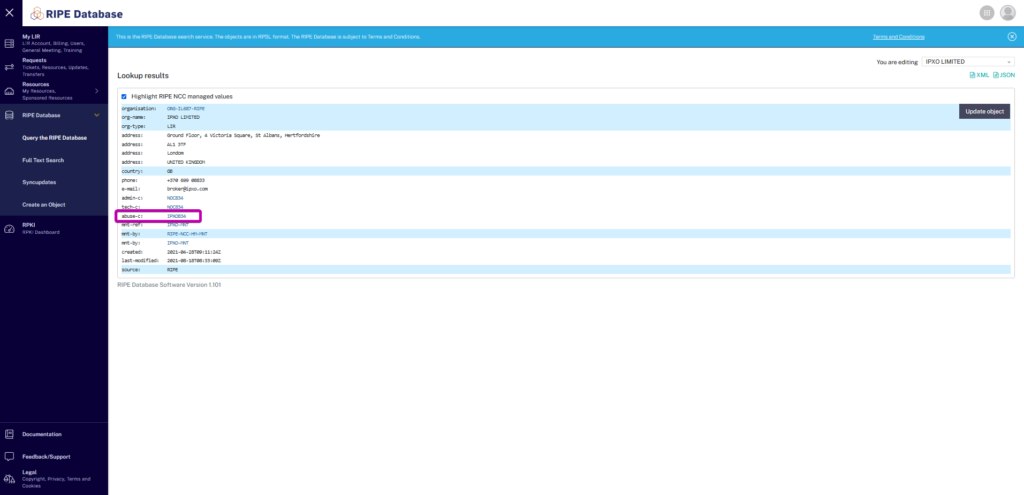
The subnet ownership confirmation email for RIPE subnets is sent to your org (organization object) abuse contact when the subnet is added to the IPXO Platform. Use the images below to find your POC.
To demonstrate, we use the subnet 45.154.4.0/23.
Org code
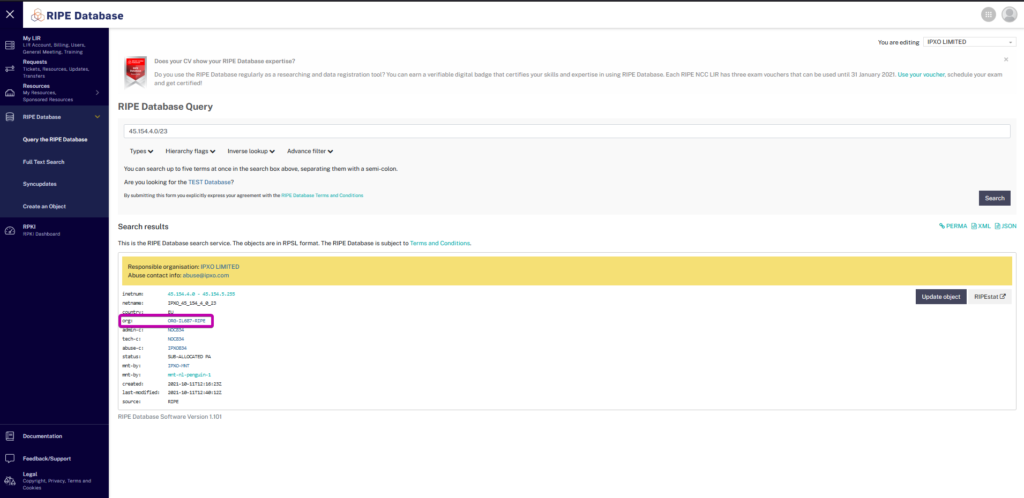
Note: The value of the org attribute must show your organization’s code.
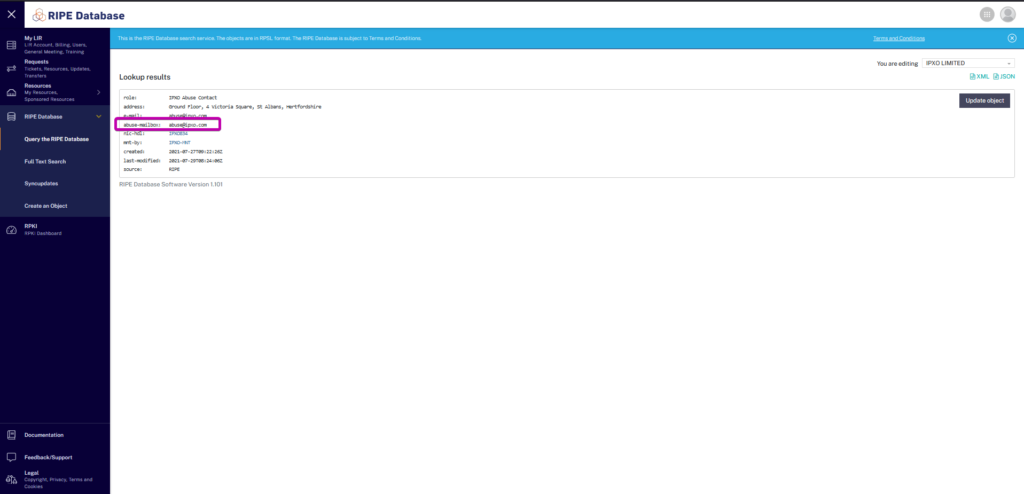
Abuse-c code
Abuse-mailbox with your abuse POC email address
The image below shows an example of the subnet ownership confirmation email.

What to do if you do not receive the ownership email?
If you have taken all of the steps described in the article, but you have not received your subnet ownership confirmation email anyway, you can always resend it.
Note: If your subnet has just been freshly acquired from RIPE, you may not receive an email. In such cases, you will have to wait 24 hours from the date specified in the Date created field of the RIPE WHOIS.
How to resend a subnet ownership confirmation email
If you want to resend the subnet ownership confirmation email, you can follow these steps.
Step 1: Access the My Monetized IPs menu
Log in to your IPXO Portal account. In the menu at the top, click Monetization and then click Monetized Subnets.

Step 2: Select subnet with the authorization pending status
In the My Monetized IPs menu, click the Subnets tab. Click the subnet that has the Authorization pending status on the right.

Step 3: Resend the email
You will receive a pop-up asking you to verify ownership, you can click the “Resend Confirmation” button to re-send the email.

If you have any questions, feel free to contact our Customer Support team via help.ipxo.com.
Contact Customer Solutions
If you have any questions, contact our Customer Solutions Team