Knowledge Base » Technical Guides » How To Set Your Organization’s Contact in LACNIC
How To Set Your Organization’s Contact in LACNIC
Step-by-step instructions on how to add or edit contact information in LACNIC.
When you add subnets to the IPXO Marketplace, you need to verify the ownership of your LACNIC-allocated subnets. To do that successfully, you need to set your organization’s contact in LACNIC. Follow this guide to learn how to do it.
Step 1: Log in to your LACNIC account
Go to the milacnic login page, log in and click Information in the menu on the left to access your organization’s information.
The image below shows where to find the current user/email set as your organization’s Administrator.

Step 2: Change to a different user or edit the current user’s email
Follow Step 2A to change to a different user.
Jump to Step 2B to edit the current user’s email.
Step 2A: Change to a different user
Click the Edit Contacts button below.

Enter the necessary information into the search fields and click Search. To demonstrate, we enter the ID (IIT8) and Email address ([email protected]), although it is enough to provide either one to find the user.
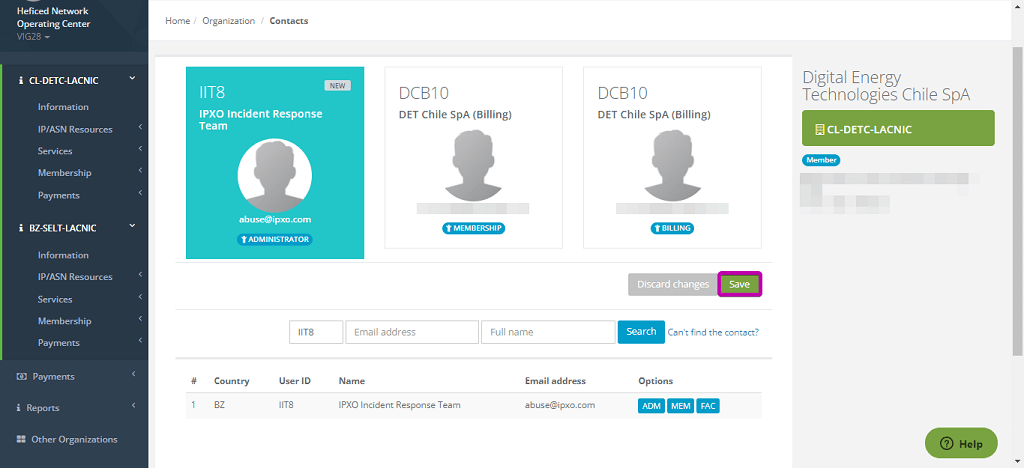
Once you find your user, select it as ADM (Administrator).
Note: If you cannot find a user or you do not have a user to select/change, you can create a new LACNIC account and then use the same search engine to change the user.

Once you select ADM and click Save, your Administrator user will be changed.

Note: LACNIC will introduce you to a message warning that if you change the administrative contact, the current user will lose the management rights. Make sure you have all the necessary login information for a new Administrator user. You need to click Save to confirm you understand the warning.

Once the change is completed, you can go back to your organization’s Information menu and see the changed administrator user/email.
Step 2B: Edit the current user’s email
Note: This will work only if the current user is set as the organization’s Administrator.
To edit the current user, go to your Profile and click Email addresses. Enter the alternate email address and click Add.
Once you add the user, you will need to verify the email address. Once it’s verified, click the Set as primary button next to it.

You are all set. Now, you can receive an ownership validation email for the resources you add to the IPXO Marketplace.
If you have any questions, feel free to contact our Customer Support team via help.ipxo.com.
Contact Customer Solutions
If you have any questions, contact our Customer Solutions Team